You can use curl with simple behavior with single flag option like
# Request to show the header with requestcurl -i url# Request to show the header onlycurl -I url# Request with Methodcurl -X GET/POST/OPTION/PUT/DELETE url# Request with verbosecurl -v url# Request with output (Download) as customfilecurl -o file-name url# Request with output (Download) as original filecurl -O url# Request with redirect to followcurl -L url# Request with silentcurl -s url# Request with spefic header (Header, Authorization, Content-Type, ...)curl -H "Header: Value" url# Request with cookies (key_value, or file )curl -b "name=value" urlcurl -b cookie.txt url# Request to save cookiescurl -c cookie.txt url# Request to insecure (Not https check)curl -k url# curl for baic authcurl -u auth:pass url# Request with Certcurl --cacert cacert.crt --cert client.crt --key client.key
But the think make curl become powerful because it can combine these flag to each others and here some useful command
# Use to read and output the content file to shell (combine them with anything use can use like bash, sh, tar, pbcopy, ...), it will show error and support redirect in silent modecurl -sSLf url | bash# Download and decompress file on the flycurl -L https://example.com/archive.tar.gz | tar xzf -# Download file for file (GitHub Packages or any repository)curl -sSLO https://example.com/archive.tar.gzcurl -sSLo archive.tar.gz https://example.com/archive_x84_x64.tar.gz
Others curl, you can use wget to download file with same behavior because in some situation both of them are not available, you can use others one. Explore more about wget here
# Download a file in silent mode (quiet)wget -q url# Download a file and output to custom namewget -O file-download url# Download recursivewget -r URL# Run on the verbose optionwget -v url# The common pattern usually apply (tar, bash)wget -qO file-download url | tar -xzf file-download# On the fly download and decompresswget -qO- url | bashwget -q -O - URL | tar -xzf - -C /path
du
You can use du command for list all size inside your directory
# List folder onlydu -csh xeusnguyen.xyz# List file insidedu -csh xeusnguyen.xyz/*
# Get the object with value = autojq 'map_values(select(.value == "auto"))' file# Get key with same situationjq -r 'map_values(select(.value == "auto"))|keys[]' file
If you wanna encode URL with jq, you can follow this
# use for encodejq --slurp --raw-input --raw-output @uri <(printf 'http://example.com/E = mc^2')
In the situation, if you want to decode jwt token, you can try with jq
You wanna update the all of key match with your request with new value, you can use walk with jq >= 1.7. In the end, It will overwrite your current file with new value.
jq 'walk(if type == "object" then with_entries( if .key == "KEY_WANT_UPDATE" then .value = "NEW_VALUE" else . end ) else . end)' "/path/json/file" > "/path/json/file.tmp" \
        && mv "/path/json/file.tmp" "/path/json/file"
If you want to get pretty json in one line, you can use compact mode with jq like this one
# To print a JSON file into one linejq -c . file.json# To convert a multi-line string variable into one lineecho "$my_json_variable" | jq -c .
scp is protocol which permit use copy and transfer file from remote and local machine with bi-direction, or cp from remote to remote
# From local to remotescp /path/file/local user@ip:/path/file/remote# From remote to localscp user@ip:/path/file/remote /path/file/local# From remote to remotescp user1@ip1:/path/file/remote1 user2@ip2:/path/file/remote2# From remote to remote (but your machine is mediate)scp -3 user1@ip1:/path/file/remote1 user2@ip2:/path/file/remote2
In some special case, you can integrate with option with your scp command to specific
Different Port: Usually scp use SSH (Port 22) to mediate help you secure transfer data through that port, but in other situation SSH not work in Port 22, you can use -p to specific
Use tunneling mode of ssh to reverse shell from remote to your local host
Info
Command below to port-forward from port 127.0.0.1:8080 from remote host and send the traffic to port :8080 inside your host
ssh -N -L 8080:127.0.0.1:8080 -i /path/to/your/private_key <user>@<remote-host> -p <port-ssh> # Default ssh via port 22, use -p if you need to specific
# With onlytree -a -L 1 -I .git# With multipletree -a -L 1 -I '.git|.terraform.lock.hcl'
Print tree with combine full path, include and exclude pattern
tree -f -I "bin|unitTest" -P "*.[ch]|*.[ch]pp." your_dir/
tar
When you want to extract or compress file into tar.gz format, you can use tar for handle this task
First of all, when you want to extract, you can use command
# List the path in tars, use -t flagtar -ztf /file/example.tar.gz# Use when it have gz (gunzip)tar -xzf /file/example.tar.gz# Use when it has only tartar -xz /file/example.tar# If you want to strip the folder inside, e.g level 1 or level 2tar -xzf /file/example.tar.gz --strip-components <level-number># If you want to output your extract to outputmkdir -p /folder/to/output # make sure folder existtar -xzf /file/example.tar.gz -C /folder/to/output# If you want to extract only specific file in compresstar -zxvf <tar filename> <file you want to extract>
Next, when you want to compress, you can use
# Use with filetar -czf /file/to/compress.tar.gz file # Use can use multiple file# Use to package foldertar -czf /file/to/compress.tar.gz folder/*
At the end, when you want to see what inside the compress, you can use
tar -tvf /file/to/compress.tar.gz
unzip
Same with tar command, unzip is one of popular command used to decompress zip format file, and sometime, you can use unzip instead tar to get more useful functionality, such as
# unzip only file inside zip file# more information: https://unix.stackexchange.com/questions/14120/extract-only-a-specific-file-from-a-zipped-archive-to-a-given-directoryunzip -p archive.zip /path/to/zipped/file > /path/to/save/file# unzip file to specific directoryunzip -d /path/to/destination archive.zip# list files in zip fileunzip -l archive.zip
set & unset
You can use set and unset command for set the environment variables, on-off history, error handler and moreover stuff. Read more at
# display name and values of shell variablesset# unset the environment variableunset <environment_variables>
To on-off history (only active action)
# commands here won't be saved (active session)set +o history # temporarily turn off historyset -o history # turn it back on# Or use can use unsetunset HISTFILE# Or use can setHISTSIZE=0
# Grant full permission for filechmod 777 /path/to/file# Grant execute for filechmod +x /path/to/file
File Permission Table
Octal Value
Symbolic Notation
Binary
Permissions Granted
0
---
000
None
1
--x
001
Execute only
2
-w-
010
Write only
3
-wx
011
Write and Execute (2+1)
4
r--
100
Read only
5
r-x
101
Read and Execute (4+1)
6
rw-
110
Read and Write (4+2)
7
rwx
111
Read, Write, and Execute (4+2+1)
Linux Permission Table
Special Permission
Octal Value
Symbol
Short Explanation
SUID (Set-User-ID)
4000
s or S (in user field)
File: Allows the program to be executed with the permissions of the file owner (e.g., running passwd as the root owner). Directory: No effect.
SGID (Set-Group-ID)
2000
s or S (in group field)
File: Allows the program to be executed with the permissions of the file’s group. Directory: All new files and subdirectories created within it inherit the directory’s group ownership for easy collaboration.
Sticky Bit
1000
t or T (in others field)
File: No effect. Directory: Restricts file deletion; only the owner of a file (or the directory owner/root) can delete or rename it, even if others have write permission to the directory (e.g., the /tmp directory).
Use fdisk when you want to hangout with your hard disk drive, like integrate multiple way for formatting or partitioning a hard disk drive, or to delete different portions of it. FDISK is an external utility. It is most commonly used to prepare and partition a hard drive
# to view details of available disk partitions.sudo fdisk -l# to view the partitions on a specific disk.sudo fdisk -l /dev/sda# to create a hard disk partition.sudo fdisk /dev/sda# to view the partition size.sudo fdisk -s /dev/sda
And when you want to hit to interaction mode you can try with
sudo fdisk /dev/sda
And when you hit keyboard with m, you can see the helper
Command (m for help): mHelp: GPT M enter protective/hybrid MBR Generic d delete a partition F list free unpartitioned space l list known partition types n add a new partition p print the partition table t change a partition type v verify the partition table i print information about a partition Misc m print this menu x extra functionality (experts only) Script I load disk layout from sfdisk script file O dump disk layout to sfdisk script file Save & Exit w write table to disk and exit q quit without saving changes Create a new label g create a new empty GPT partition table G create a new empty SGI (IRIX) partition table o create a new empty DOS partition table s create a new empty Sun partition table
iostat
You can use iostat for listing and monitoring your input and output of your disk, by this action you can doube-check state and bottleneck inside
Disk I/O Monitoring - This displays disk I/O statistics every 5 seconds, including utilization, queue length, and wait time
Check the log systemd in catalog and pagination, you can use
journalctl -xeu service-name.service--catalog -x -- Show explanatory texts with each log line --pager-end -e -- Jump to the end of the journal in the pager--unit -u -- Show data only from the specified unit
Check the only kernel message by command
journalctl -k # show only kernel
lsblk
If you want to take the look with your storage device like HDD or SSD, you can use lsblk to see what format of those devices
# View information about your disklsblk -o NAME,HCTL,SIZE,MOUNTPOINT# View output info about filesystemslsblk -f
File System
Supported File Size
Compatibility
Ideal Usage
FAT32
up to 4 GB
Windows, Mac, Linux
For maximum compatibility
NTFS
16 EiB – 1 KB
Windows, Mac (read-only), most Linux distributions
For internal drives and Windows system file
Ext4
16 GiB – 16 TiB
Windows, Mac, Linux (requires extra drivers to access)
For files larger than 4 GB
lsof
lsof is a command for LiSting Open Files. Find and explore more at documentation
To check network connection, you can use
lsof -i -P -n
Find files open to a process with known PID, e.g: 1234, you can use
The kernel uses modprobe to request modules. The modprobe command searches through the standard installed module directories to find the necessary drivers.
Check Running Processes - This lists the top 10 processes sorted by CPU usage, helping you quickly identify resource-intensive processes.
ps aux --sort=-%cpu | head -10
hostnamectl
When you think about change your current hostname for present your machine in network, ssh connection, you can use hostnamectl for hand-on it. Explore more at
First of all, you can check your hostname information by
# Simplehostnamectl# Complete commandhostnamectl status
Next, you can exchange your hostname for couple of types with option set-hostname (NOTE: required root permission), including
# transient - Assigned by mDNS server or DHCP server during run timehostnamectl set-hostname new-name --transient# static - used to initialize the kernel hostname during boot timehostnamectl set-hostname new-name --static# pretty - the hostname presented to the user, not to other computers on a networkhostnamectl set-hostname new-name --pretty# combine three types, transient, static and prettyhostnamectl set-hostname new-name
Check configure or state of service with systemctl command
sudo systemctl show/status <name_of_services>
To reload systemd manager configuration
sudo systemctl daemon-reload
vmstat
If you want to see more information about your virtual memory statistics, you can use vmstat instead of free command. vmstat will let you know about about processes, memory, paging, block IO, traps, disks and cpu activity.
# view in short and basic formvmstat# view more specific form, for show counter staistic in Megabyte outputvmstat -s -sM
To see fully manual page, you can use man command or double-check at cheat.sh site
man vmstatcurl cheat.sh/vmstat
free
The simple version of vmstat, you can use free which show directly the useful information to let you monitor your memory, especially distinguish and figure out the OOM event with high buffer/cache mem or something interesting. Check more at Linux Memory
# view your memory in output humanizefree -h# minitor with a loop instead of watch,e.g: reload every 2sfree -h -s 2
crontab
If you work in longtime with Linux, crontab is becoming the friend of yah, with let you schedule your command or script base on the linux scheduler as cronjob
Now you can use couple of command to edit/add/remove the crontab
# for editingcrontab -e # use default editorEDITOR=nano crontab -e # use nano for instead if vim set up# for listingcrontab -l# for remove all cronjobcrontab -r# replace current crontab by another filecrontab path/to/file
chattr & lsattr
There are some advanced option for your to configure your file, but it doesn’t use popular but it one of powerful technique let you control your file mutable ability for all user, even if root. Read more at GeekforGeeks - chattr and lsattr commands in Linux with examples
To view the attribute of your file, you can use lsattr command
# basic command for filelsattr /path/to/your/file# if you want to recursivelsattr -R /path/to/directory# or specific directorylsattr -d /path/to/directory
For understanding the output, you can check table below
Attribute
Symbolic Character
Full Name / Short Explanation
Append-Only
a
File can only be opened in append mode; existing data cannot be overwritten or truncated.
Compressed
c
The file is automatically compressed by the kernel (filesystem-specific).
No Dump
d
The file is excluded during a file system dump (backup).
Extent Format
e
The file is using extents for block mapping, a feature of the ext4 filesystem for improved performance with large files.
Immutable
i
The file is immutable; it cannot be modified, deleted, renamed, or linked to, even by the root user.
Data Journaling
j
All data is written to the journal before being written to the file (filesystem-specific, like ext3/ext4).
Synchronous Updates
s
Changes to the file are written to the disk synchronously (immediately), bypassing the write cache.
No Tail-Merging
t
Prevents the use of tail-merging, a space-saving optimization that combines small file tails into a single block.
Undeletable
u
When the file is deleted, its contents are saved by the kernel, allowing for potential undeletion.
To change the attribute, you can use chattr command. As usual, for secure or protect your file and directory, the attribute i immutable always be considered
# To add immutable to your file or directorychattr +i /path/to/file # specificchattr -R +i /path/to/directoy # recursive for directory# To remove immutable to your file and directorychattr -i /path/to/file # specificchattr -R -i /path/to/directory # recursive for directory
chown & chgrp
Another critical attribute for changing file permissions is ownership, which allows you to set which user or group a file belongs to. This is particularly helpful when working in environments with multiple users.
Info
The chown command is the more comprehensive command, as it can change both the user owner and the group owner of a file (or just the user owner). However, the chgrp command is built specifically to change only the group owner. You can use either command depending on whether you need to change both or just the group.
# change user owner of specific file/directorychown <user> /path/to/file/or/directory# change user/group owner of specific file/directorychown <user>:<group> /path/to/file/or/directory# change user owner but recursive files in directorychown -R <user> /path/to/directory
If you want to use chgrp only, you can use
# change group ownerchown <group> /path/to/file/or/directory# change group owner but recursivechown -R <group> /path/to/directory
lspci
If you encounter trouble with your PCI, hardware connector, you can use lspci to list the information and view what pci error define for what component
# View basiclspci# specific the devicelspci -s [[[[<domain>]:]<bus>]:][<slot>][.[<func>]] # Show only devices in selected slots# see the verbose versionlspci --vv -s [[[[<domain>]:]<bus>]:][<slot>][.[<func>]] # Show only devices in selected slots
sysctl
By default, Linux will setup couple of kernel param and in some case you need to modify to prevent error appearance. Explore more about sysctl command at [[Awesome Linux Troubleshoot#control-kernel-parameter|Control Kernel Parameter with sysctl]]
To see the default kernel param, you can double-check with command
# To view allsudo sysctl --all# To have couple of filterssudo sysctl --all | grep -e "net" # for networksudo sysctl --all | grep -e "fs" # for filesystem# To specific valuesudo sysctl fs.inotify.max_user_watches
To modify the value, you can use system with specific param
# Specific with different number compare with default (temporary)sudo sysctl -w fs.inotify.max_user_watches=524288
To reload the sysctl configuration file from /etc/sysctl.conf and /etc/sysctl.d/ files
sudo sysctl -p# To specific filesudo sysctl -p /path/to/custom# Load all filesudo sysctl -f
Info
The system loads settings from the following configuration files: /run/sysctl.d/*.conf, /etc/sysctl.d/*.conf, /usr/local/lib/sysctl.d/*.conf, /usr/lib/sysctl.d/*.conf, /lib/sysctl.d/*.conf, and /etc/sysctl.conf.
If you want to use another tool for networking check about open/listening/establish service, you can you netstat
The common command for listening service with process_id and don’t show specific host
netstat -lnvp
View routing table
netstat -r
To view which users/processes are listening to which ports
netstat -lnptu # or sudo for more detail
List listening TCP and UDP ports (+ user and process if you’re root)
netstat -lepunt
Find the correspond listening port with which service/user
netstat -pln | grep <port> | awk '{print $NF}'
To statistic
# statistic for both udp and tcpnetstat -s# statistic for tcpnetstat -st# statistic for udpnetstat -su
View network interface
# basicnetstat -i# extend infonetstat -ie # same as ifconfig
ss
If you familiar with netstat which usually not install from starting with almost Linux Distro, but instead of this one, you can try to use ss which integrate into default tool to debug networking
To show listening port in your host, you can use
# command will show progress with port openning (listening)ss -tupl
To show establish process, you can use
# If you don't wanna show service,e.g: https, http, smb, ...ss -tunp# Show servicess -tup
When you want to add filter socket port number, you can use
# Use Port Numberss -at '( dport = :22 or sport = :22 )'# Use Servicess -at '( dport = :ssh or sport = :ssh )'
Info
If you are not found ss command, you can read file /etc/services for alternative which show us port and service mapping
dig
When you have demand to find information about IP Address and other DNS record, you can use dig command
# find the IPv4 of example dnsdig +short A example.com# specific dns server for searchingdig @8.8.8.8 +short A example.com# see more information with verbose outputdig +noall +answer +comment example.com
Info
There are a lot of DNS records you can find with the dig (Domain Information Groper) command:
A (Address) Record: Maps a domain name to an IPv4 address. This is the most common record for finding a website’s IP.
AAAA (Quad-A) Record: Maps a domain name to an IPv6 address.
CNAME (Canonical Name) Record: Used to create an alias from one domain name to another (e.g., www.example.com is an alias for example.com).
MX (Mail Exchange) Record: Specifies the mail servers responsible for accepting email on behalf of a domain name.
nc
To check port open or not (Inbound), you can use nc with some options to retrieve information. Explore more at:
# Check port TCP open or not after 5s timeoutnc -z -v -w5 <host> <port># Check list port tcp from X to Y open or not after 5s timeoutnc -z -v -w5 <host> <portX>-<portY># Check port UDP or notnc -z -u -v <host> <port>
How about port open but outbound, you can reuse nc for testing via remote host called portquiz.net
nc -v portquiz.net <port-outbound-test>
Note
You can also take another tools for check the outbound connection with curl, wget or telnet to portquiz.net
sudo iptables -A INPUT -p <tcp/udp> --dport <destination-port> -j DROP
List all rule and table rule
# List all rulessudo iptables -S# list all tables rulessudo iptables -L -v -n | more# list all rules for INPUT tablessudo iptables -L INPUT -v -n
Delete rule in iptables
# Basic command to deletesudo iptables -F# To specify you want# Find your rule base on numberiptables -L INPUT --line-numbers# Remove that base on number of lineiptables -D INPUT <specific-line-number># IYKYN, use `-D` flag for same command `-A` to remove that rule
For situation, you have subscription and aware to use OpenVPN with WedAdmin UI, I truly recommend you to read these documentations from official and also absorb more knowledge from scratch for OpenVPN Setup
If you are using Ubuntu Gnome Distribution, you can use command below to install openvpn client application via network-manager. Read more at OpenVPN NetworkManager setup guide
After install, you can use network-manager to import the ovpn profile and easier to use them via the utilities box of Ubuntu at homepage
Note
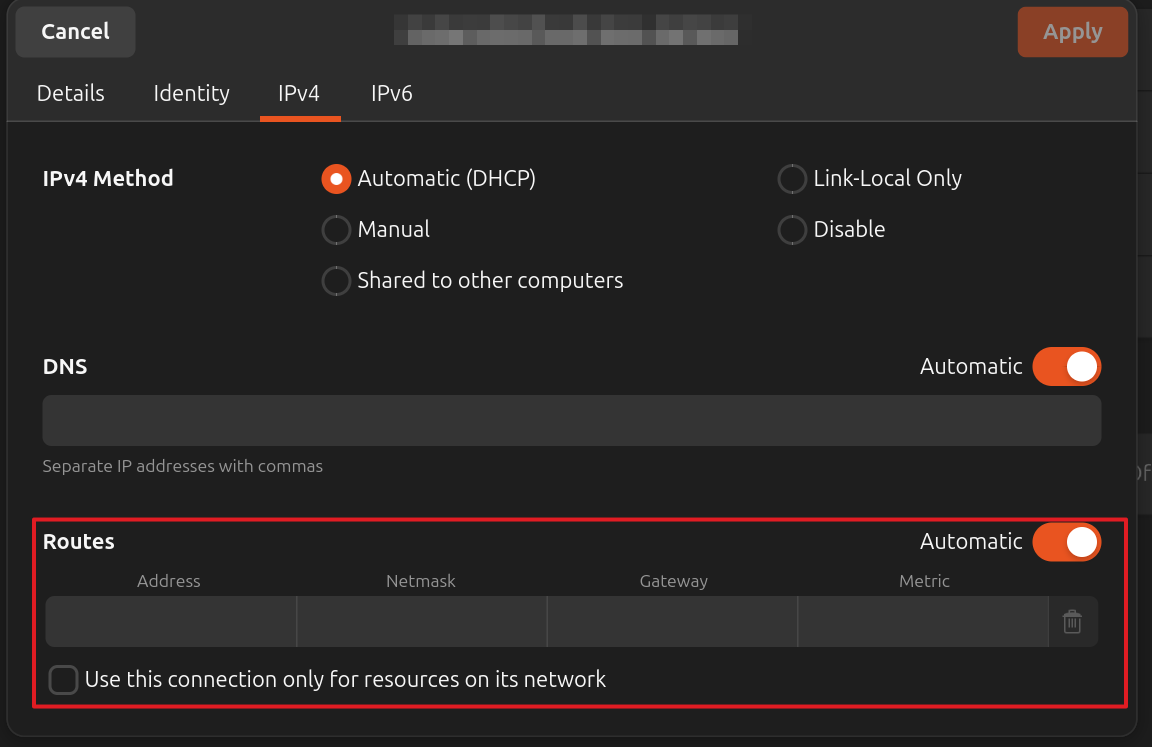
If you want to only use that VPN network for private connection only (via Private network), you can turn on the options network plan for changing your public IP Address
For situation, you want to use CLI Only, it requires you install openvpn3-client with command below. Read more these documentations and configuration for more information
To import config, you can use command config-import to import new ovpn profile and you can use them as persistently via service of systemd, or run it manually by several commands below
Info
If you don’t set any name for your profile, it will set the config-path of your ovpn file.
# Import the profileopenvpn3 config-import --config /path/to/vpn/config --name config-name# List of profileopenvpn3 configs-list# Now start the session with commandopenvpn3 session-start --dco true --background --persist-tun --config config-name# Check the status of sessionsopenvpn3 sessions-list# End the specific session# session-manage can do clean, restart, resume, pause with config# End the session with specific config-nameopenvpn3 session-manage --disconnect --config config-name# Or you can end endsession with path via sessions-listopenvpn3 session-manage --disconnect --path /path/session
If you encounter the error when setup with profile not support compression, you can use command below to change the compression mode. Read more at OpenVPN versus Compression
With this change, you can use openvpn3 to setup the compression mode
openvpn3 config-manage --config config-name --allow-compression asym# Show the configurationopenvpn3 config-manage --config config-name --show
Same as the network-manager, if you don’t want change your public IP address for ingress/egress, you can use command or manually add config into profile as split tunnel to change what following concept you want. Read more at
For my situation, I choose to add route-nopull into client profile for split this tunnel and only use them for private only. You can following step below
Edit your .ovpn profile (NOTE: remember copy another version for backup)
Add route-nopull at the end of client file before the certificate part
Import profile into openvpn3 and start them for normal. Now are already split the tunnel as you want
pritunl
With Pritunl, you will have great platforms for creating and managing VPN connection supported both OpenVPN and Wireguard Protocols. Because Pritunl creates the standard configuration profile, so that why it’s require you to install Client version. Find more download options at Pritunl Client Installation
 With this change, you can use