Quote
Hi @all, If you know you know, I am doing the full completely progress when you want to build mobile application. Therefore on part 2, I will guide you to understand how you can sign your application with keystone, beta release to Google Play 👍👍👍
(NOTE: Android is go first, Because it is cheaper than IOS, and easily to release)
You can find another topics in series down below
Create account and connect fastlane to Google
Note
This step is very important, and risk to you because it will charge you
25$to create your organization. You need to concern that, and yup let’s digest !!!
You can access Google Play Console, It will redirect to registration page, sorry because it writes in my primary language, but imaginary you will have 2 options, organization and personal.
- With
orgranization, if you want to create an account for an organization or business, even if you are a sole proprietorship. - With
personal, if you want to create an account for yourself and don’t have an organization or business.
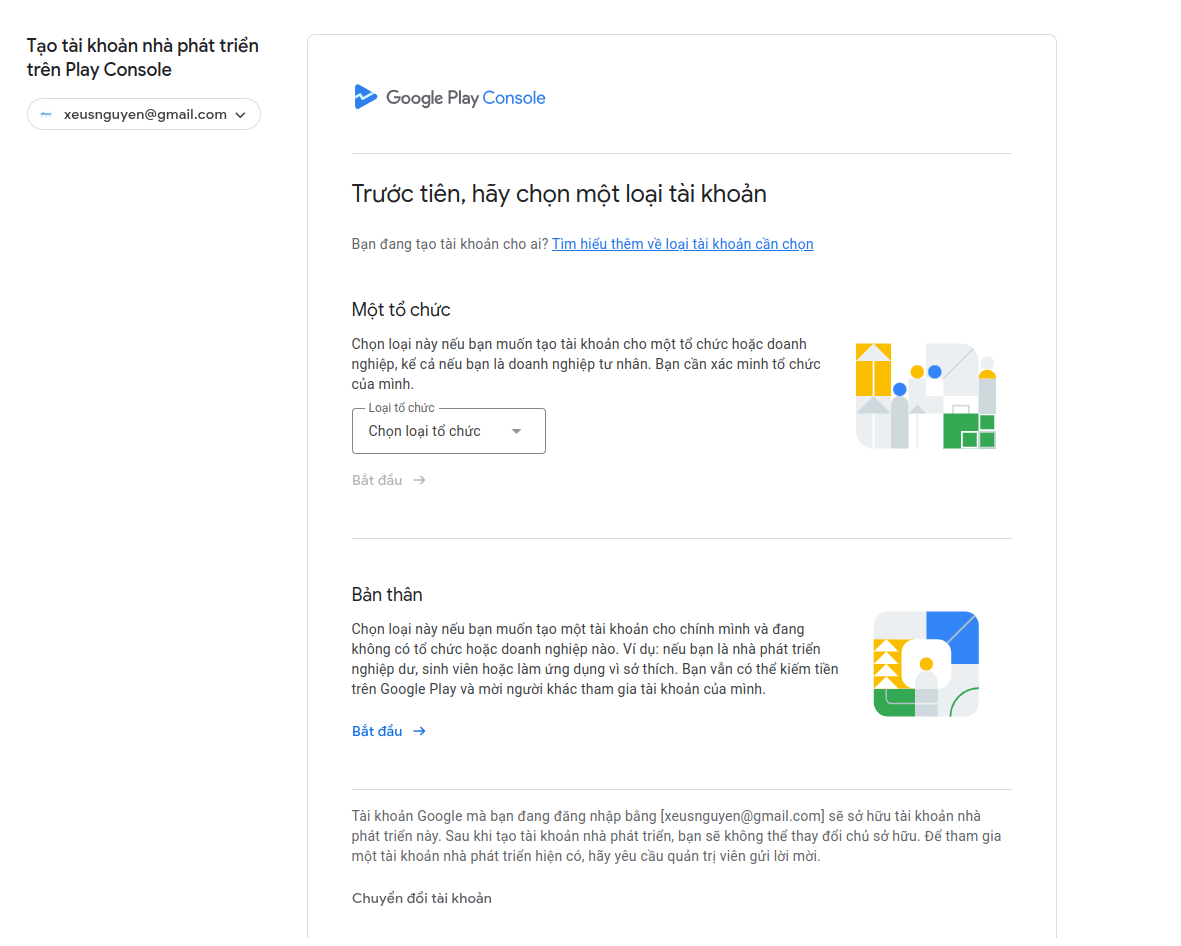
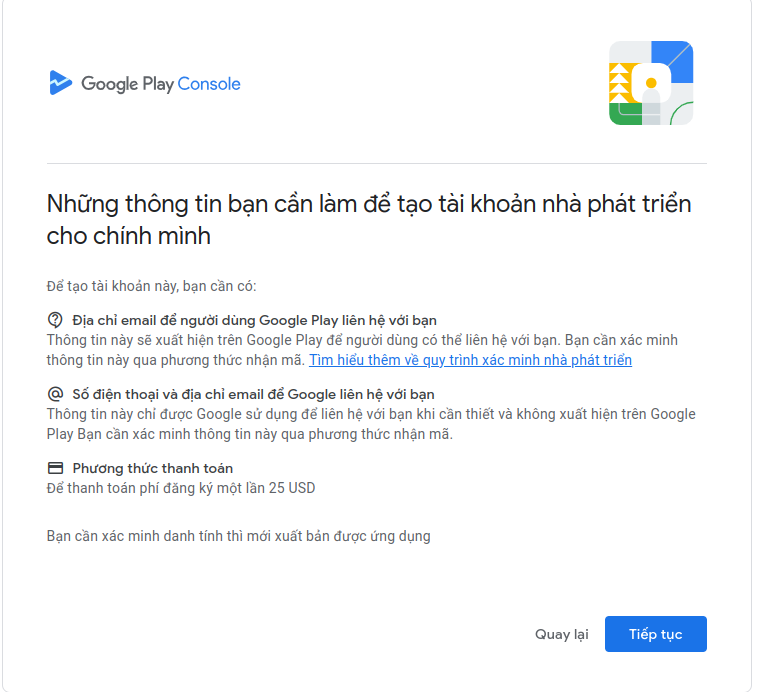
On my opinion, you can choose personal mode, It will charge you 25$ for create the account. And another, you need to provide email address, phone number and your methodology to paid your service (Visa debit or credit)
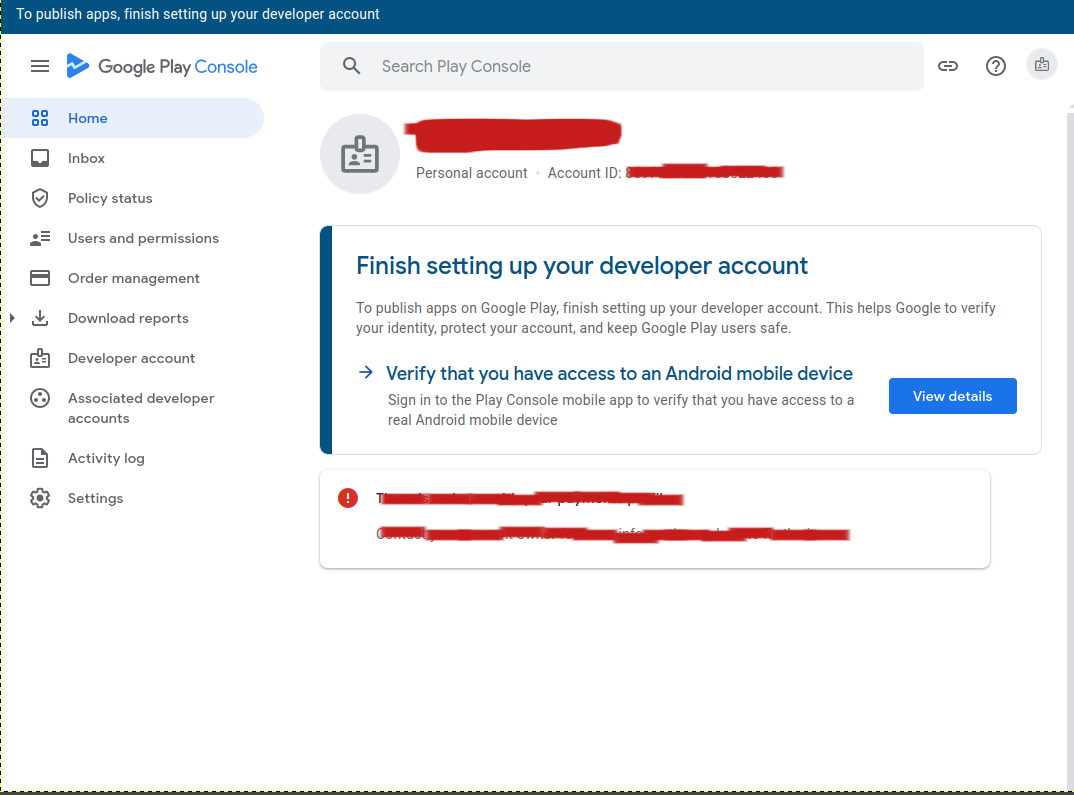
When you have it, your Google Play Console will already for in use (Sorry because private information)
Let’s back to fastlane documentation, gracefully they give us the specify to talk about releasing android applications. Read more at: Getting started with fastlane for Android
With android, you will use extension belong fastlane called supply
Info
supplyis a fastlane tool that uploads app metadata, screenshots and binaries to Google Play. You can also select tracks for builds and promote builds to production!For supply to be able to initialize, you need to have successfully uploaded an APK to your app in the Google Play Console at least once.
Setting it up requires downloading a credentials file from your Google Developers Service Account.
Therefore, you need to give time to create Service Account for fastlane validate connection to Google Play Console. Follow the step base on fastlane documentation or official documentation from Google
After create and validate, you will have key-xxx.json with include credential variables to authentication to Google Console (NOTE: Keep it secrets because leaking will dangerous because Admin Permission)
{
  "type": "service_account",
  "project_id": "xxxxxxxxxxxxxxxxxxxxxxxxxxxxxx",
  "private_key_id": "xxxxxxxxxxxxxxxxxxxxxxxxxxxxxxxxx",
  "private_key": "xxxxxxxxxxxxxxxxxxxxxxxxxxxxxxxxxx",
  "client_email": "xxxxxxxxxxxxxxxxxxxxxxxxxxxxxxxxxx",
  "client_id": "xxxxxxxxxxxxxxxxxxxxxxxxxxxxxxxxxxx",
  "auth_uri": "https://accounts.google.com/o/oauth2/auth",
  "token_uri": "https://oauth2.googleapis.com/token",
  "auth_provider_x509_cert_url": "https://www.googleapis.com/oauth2/v1/certs",
  "client_x509_cert_url": "xxxxxxxxxxxxxxxxxxxxxxxxxxxxxxxxxxxx",
  "universe_domain": "googleapis.com"
}
To validate fastlane can authentication, use run command with extension validate_play_store_json_key
fastlane run validate_play_store_json_key json_key:/path/to/your/key/json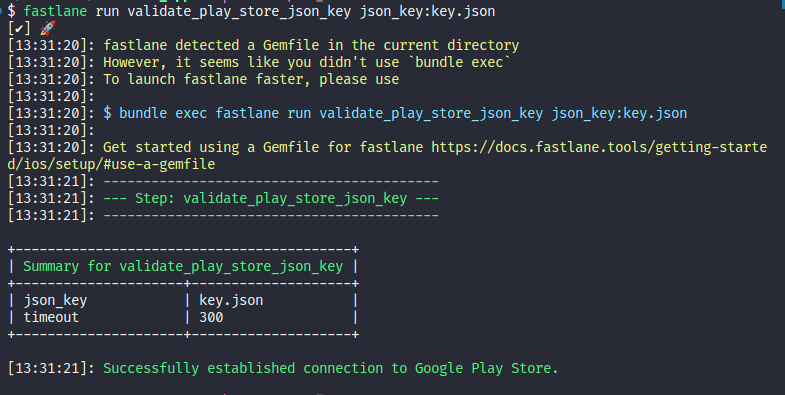
Success
Successfully, you are connecting to Google Play Account, and ready to release your application 😏
Create your application on Google Play
On first sight, you will have two way to create application, such as
- Create through portal of Google Play Console
- Use the
fastlaneandsupplyto fetch metadata, if not exist,fastlanewill create it
On my situation, the problem occur when supply from fastlane local to Google Play Console, therefore, obligatory I must choose first option
First of all, you will go Home and choose Create app
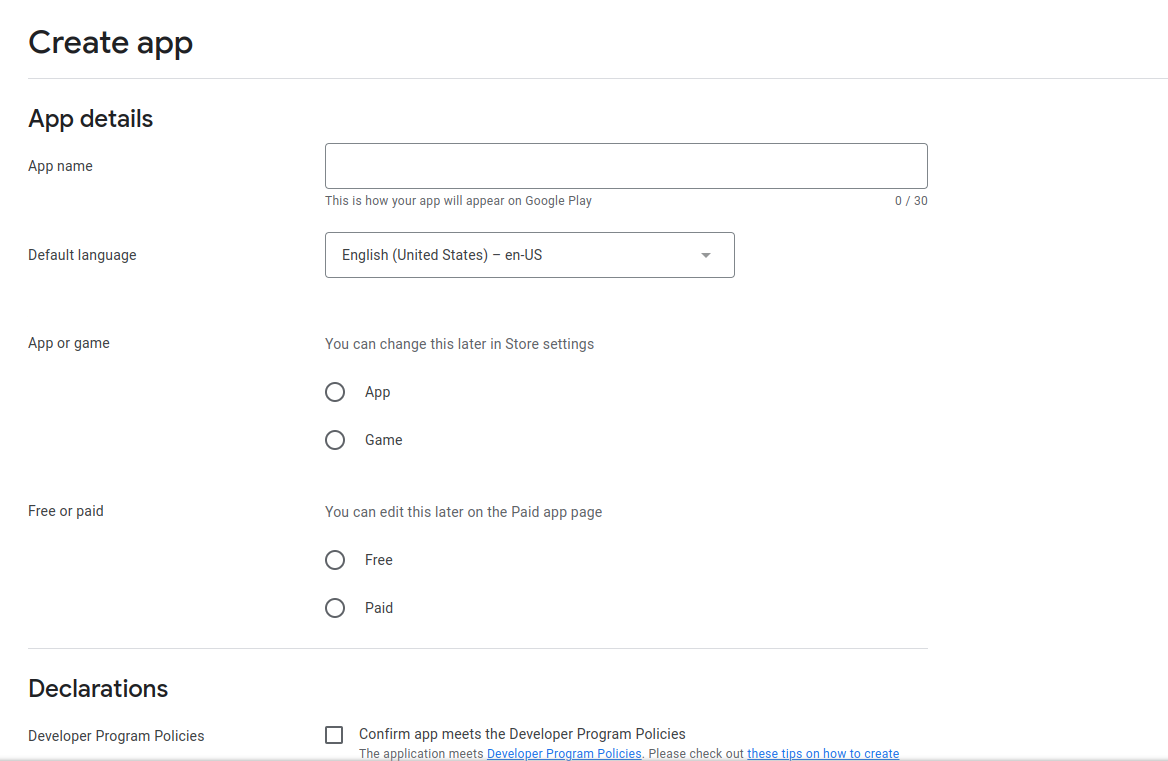
You will require to providing App name, Type of app, Paid or not, … After fill all form, click Create app to create Android application
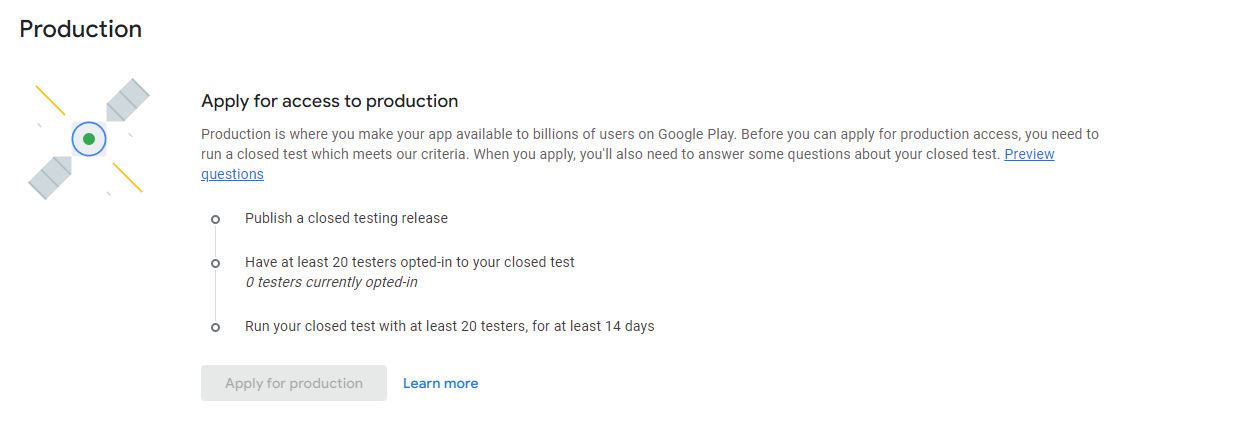
And the problem is official starting, base on the rule and requirements in November 2023 of Google, your application need to participant to testing progress before your application available on Google Play. Read more at: App testing requirements for new personal developer accounts
I mean you need to push the bundle of application maybe apk or aab, perform test and that will cost us 2 week to official release to Google Play.
Before you can do this, let’s learn about sign code because Google Play requires the version of bundle already sign for release, and don’t approve for debug mode

Sign code for your application
You have multiple way to sign your code, and I think the relate link that helpful for us, such as
- Youtube - Signing App & Building Release App Using Fastlane (Android) : Very clear step but him said on the Egypt language
- Publishing to Google Play Store : Official Documentation of React Native
- Azure - Code sign for Android : Article about build android written by Azure
- Bitrise - Android code signing using the Android Sign Step : Article about automation ci/cd for their platform bitrise
- Android Studio - Sign your app : Methodology use android studio for sign the application
- fastlane configuration to sign your app : Use gradle properties in fastlane to sign your app
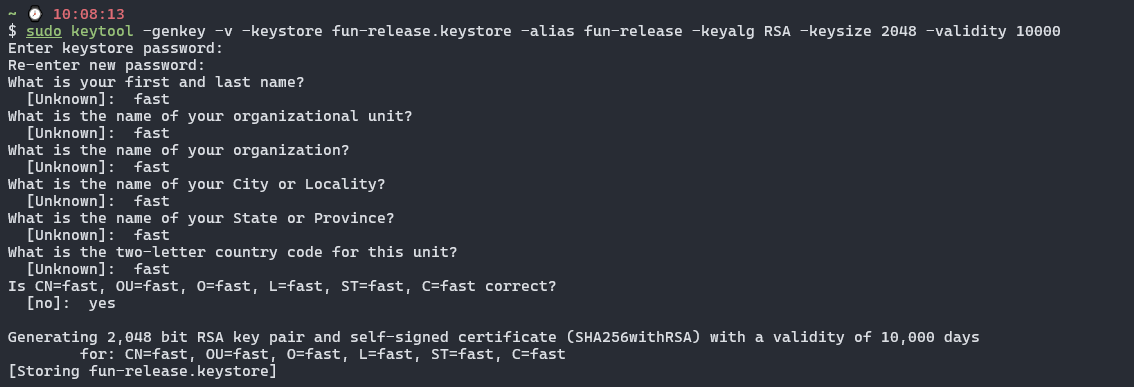
To generate keystroke, you can use keytool which install with java
sudo keytool -genkey -v -keystore my-upload-key.keystore -alias my-key-alias -keyalg RSA -keysize 2048 -validity 10000Remember put the input requirement, and on the last step It will ask you about confirm Yes/No, typing yes and your key will generate in current location
Let try two method, first one configuration to build.gradle and properties of Gradle, second one, I will config directly to Fastfile
Configuration on Gradle
Base on documentation, you need to move keystore to android/app directory, you can perform or not because if your keystore exist, you wouldn’t need to do that
mv my-upload-key.keystore android/appNext, configure gradle.properties with these variables, remember ***** to your actually password
MYAPP_UPLOAD_STORE_FILE=my-upload-key.keystore
MYAPP_UPLOAD_KEY_ALIAS=my-key-alias
MYAPP_UPLOAD_STORE_PASSWORD=*****
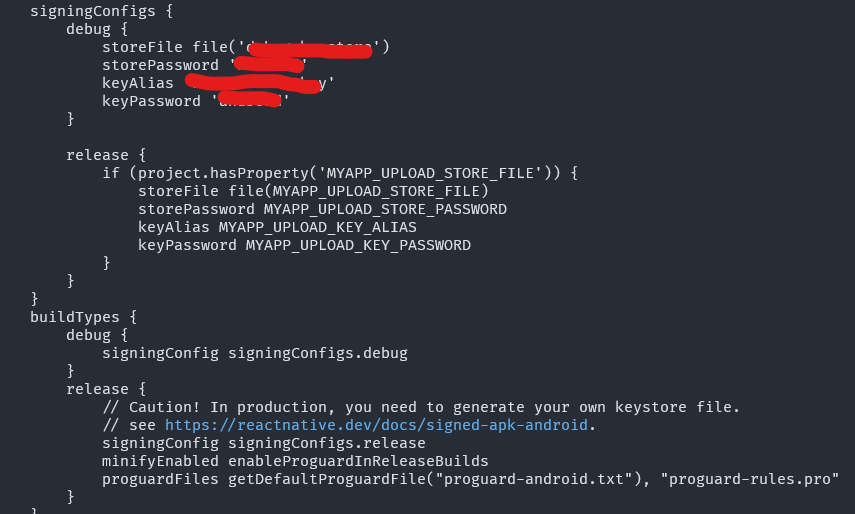
MYAPP_UPLOAD_KEY_PASSWORD=*****If you save the completely, reach next to build.gradle on ./app directory
...
android {
    ...
    defaultConfig { ... }
    signingConfigs {
        release {
            if (project.hasProperty('MYAPP_UPLOAD_STORE_FILE')) {
                storeFile file(MYAPP_UPLOAD_STORE_FILE)
                storePassword MYAPP_UPLOAD_STORE_PASSWORD
                keyAlias MYAPP_UPLOAD_KEY_ALIAS
                keyPassword MYAPP_UPLOAD_KEY_PASSWORD
            }
        }
    }
    buildTypes {
        release {
            ...
            signingConfig signingConfigs.release
        }
    }
}
...
Go to the fastlane folder, and change some configuration on Fastfile like
default_platform(:android)

platform :android do
  desc "Build application to apk file"
  lane :buildDebug do
    gradle(
      task: "clean assembleDebug",
    )
  end

  desc "Build application to aab file"
  lane :bundleDebug do
    gradle(
      task: "bundleDebug",
    )
  end

  desc "Build application release to apk file"
  lane :buildRelease do
    gradle(
      task: "clean assembleRelease",
    )
  end

  desc "Build application release to aab file"
  lane :bundleRelease do
    gradle(
      task: "bundleRelease",
    )
  end
end
and trigger fastlane command
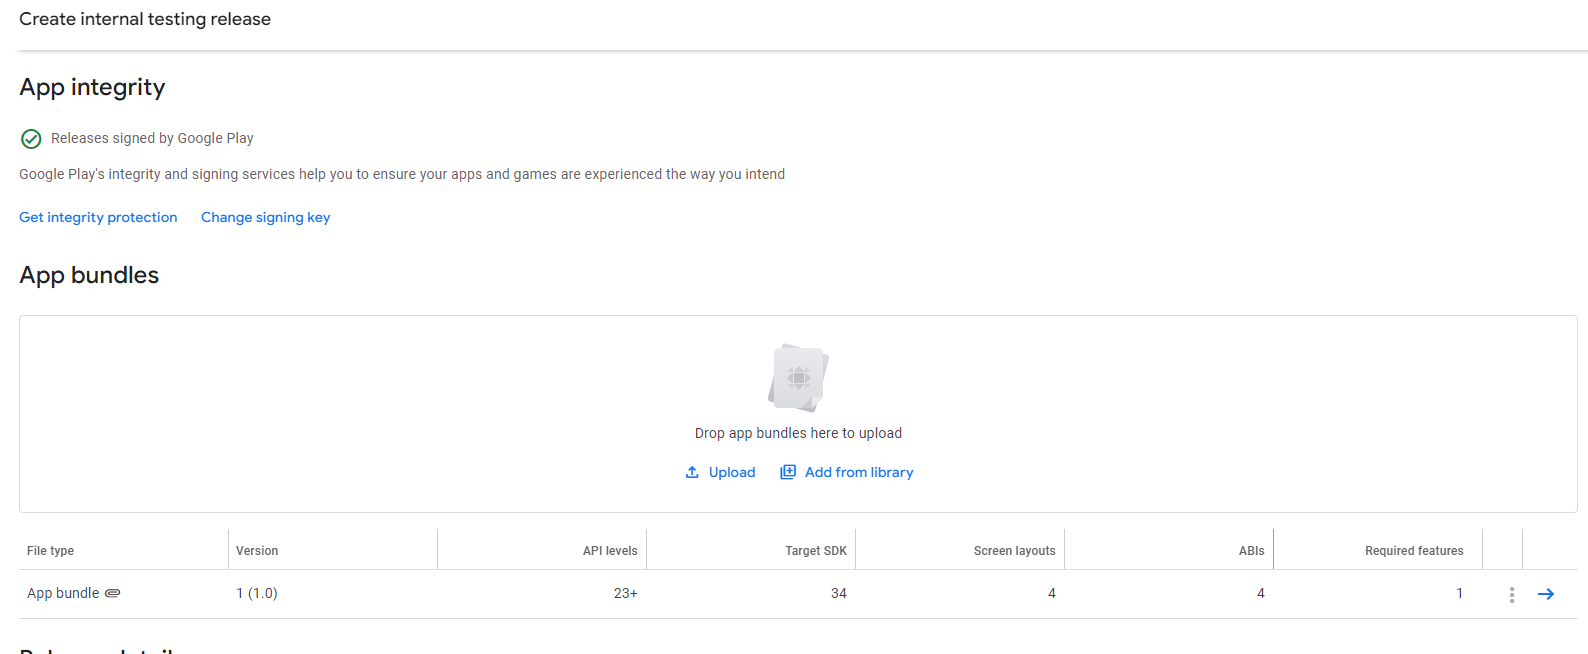
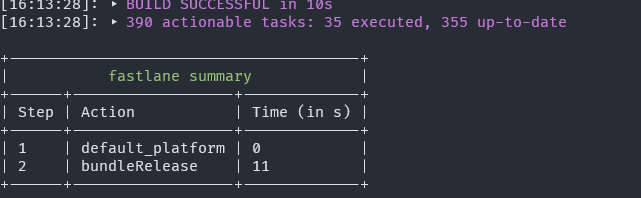
fastlane android buildRelease && fastlane android bundleReleaseYour bundle app will export to app/build/outputs/bundle/release/, and you can upload that Google Play to see what you got
Set properties on fastlane
So I will keep state in current methodology 1, checkout develop and test on the second one 😄. With second, simply change on Fastfile with overwrite the configuration
First of all, we will move keystore file to location on /home/$USER, After that, add to Fastfile on the lane release with option properties, For example
# See your user
echo $USER

cp -r keystore.jks /home/$USER...
gradle(
task: "assemble",
build_type: "Release",
print_command: false,
properties: {
"android.injected.signing.store.file" => "/home/user/keystore.jks",
"android.injected.signing.store.password" => "store_password",
"android.injected.signing.key.alias" => "key_alias",
"android.injected.signing.key.password" => "key_password",
}
)
...That all, you just perform fastlane command, and you will get the sign application with no change in gradle file
default_platform(:android)

platform :android do
  desc "Build application to apk file"
  lane :buildRelease do
    gradle(
      task: "clean assembleRelease",
      print_command: false,
      properties: {
        "android.injected.signing.store.file" => "/home/user/xxxxxxxx",
        "android.injected.signing.store.password" => "xxxxxxxx",
        "android.injected.signing.key.alias" => "xxxxxxxx",
        "android.injected.signing.key.password" => "xxxxxxxx",
      }
    )
  end

  desc "Bundle application to aab file"
  lane :bundleRelease do
    gradle(
      task: "bundleRelease",
      print_command: false,
      properties: {
        "android.injected.signing.store.file" => "/home/user/xxxxxxxx",
        "android.injected.signing.store.password" => "xxxxxxxx",
        "android.injected.signing.key.alias" => "xxxxxxxx",
        "android.injected.signing.key.password" => "xxxxxxxx",
      }
    )
  end
end
fastlane buildRelease && fastlane bundleRelease
And double check on location app/build/outputs/apk/release and app/build/outputs/bundle/release, your binary of application will still there
App Signing from Google (Update - Google Play Console)
Info
When you try to release app into Google Play, If your application contains service to authenticate Google Account using (Firebase, Google API, …), you need to focus and find this client information, like SHA1, SHA256 in Google Play Console and submit into Google Cloud in API
To get that app signing information from Google Play Console, You can try to reach from your App ⇒ Test and release ⇒ App Integrity ⇒ Settings (Play app sigining)
You can see the some certificate (key) information inside your application, including
- App signing key certificate: Google Play Integrity (Recommendation) will help you to sign your app with this certificate
- Upload key certificate: Match with the key which you use to sign app, and upload into Google Play Console from your Build Progress
- Digital Asset Links JSON: To associate your app with a website domain.
From this page, you can get fingerprint of certificate in format: MD5, SHA-1, SHA-256. You can add the fingerprint with two way
-
Use Firebase Authenticate, you can add directly into project settings in your application, in general tab, you will see the place to add fingerprint. After you add, you click save and your firebase will automatically create inside Google APIs & Services
-
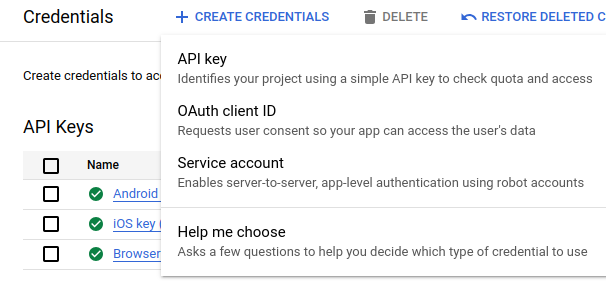
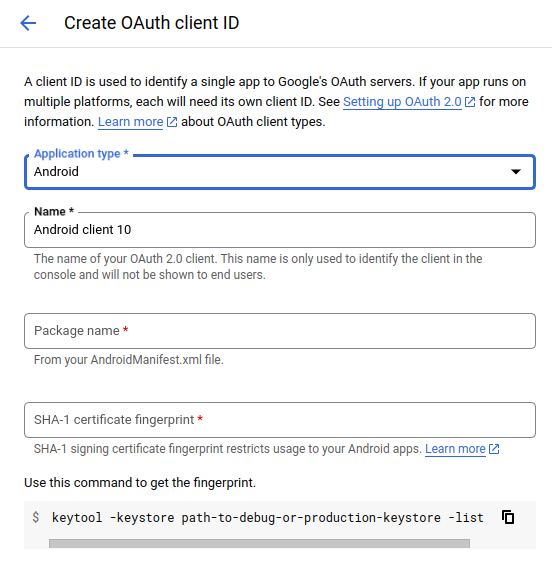
If you don’t want to work with firebase, you can add into Google APIs & Services in Google Cloud, you can select Credentials to see full authenticate of your application linked. You can choose
Oauth client ID, and fill information inside and click create and you will linked Google Play App Signing SHA-1 into Google APIs & Services to get user data (NOTE: This one is really important to execute successful Google Authenticate)
Conclusion
Info
That all for today, happy to learn how we can sign the application, submit and create application on google play . But not thing easily, base on rule from Google, I will write new release part to guide you about how we can official release application to Google Play and It needs a time to completely 😃
Quote
So hopefully you enjoy with my sharing about
fastlanebuild, the way to custom sign your application and upload success to Google Play for Internal test. Therefore, wait and see what you got on the next part of series. Stay safe, learn more and see you soon @all. See yah !!! 😄