Quote
Hi @all, how are you going ? Mess up, and not have mood to write anything because kind of stuff in social life. But as you can see, I must to do for probably myself to continuous contribute, so here I am. Today, I want to guide you about how we can implement own Terraform for yourself, distribute and see what how far you adapt with that for project. Let’s digest with target AWS SSO
AWS SSO
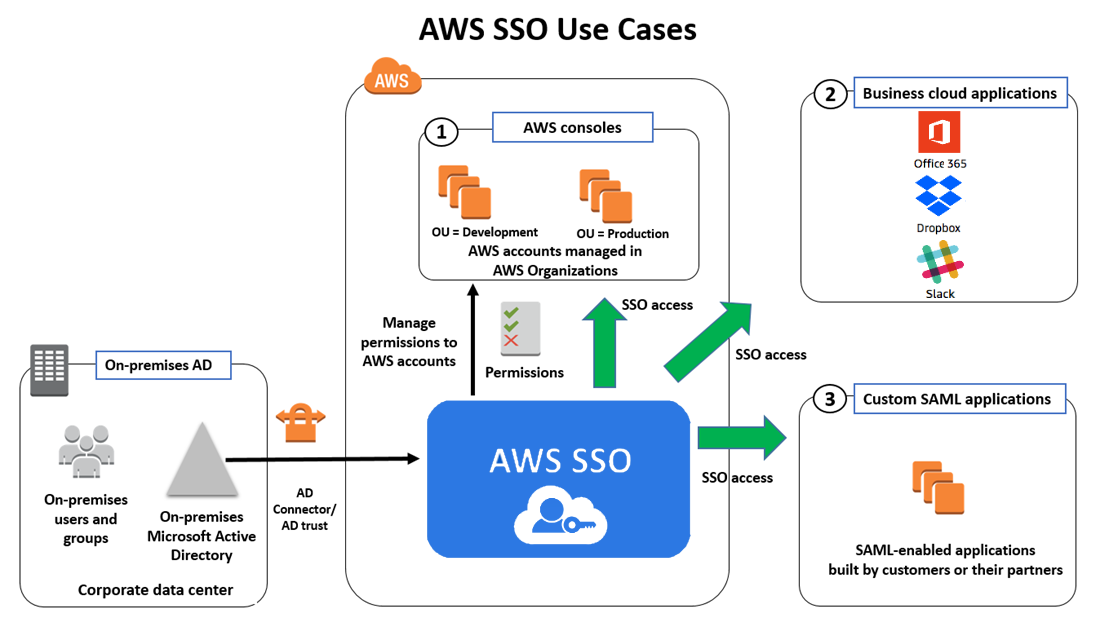
As usual, before starting anything, we need to learn about tech stack, and AWS SSO (IAM Identity Center) is super cool, and really helpful when you think about solution for authorization and authentication for AWS Account and profiles
Introduce
Explore about the definition and benefit of AWS SSO, through those articles
- AWS - Introducing AWS IAM Identity Center
- AWS - AWS Single Sign-On (AWS SSO) is now AWS IAM Identity Center
- AWS - What is SSO (Single-Sign-On)?
- AWS - AWS IAM Identity Center
- Cloudsoft - Everyone should be using AWS SSO. Here’s why
Info
AWS IAM Identity Center is the recommended service for managing your workforce’s access to AWS applications, such as Amazon Q Developer. It is a flexible solution that can be used to connect your existing identity source once and gives your AWS applications a common view of your users. Your users get a streamlined, consistent experience across AWS applications. It works alongside existing AWS account access configurations.
With many features of AWS Identity Center, you will receive some excited benefit
- Connect your existing identity source to streamline accessing AWS
- Efficiently manage workforce access to AWS applications
- Improve control and visibility of user access to data in AWS applications
- Manage workforce access to a multi-account AWS environment
Why do we need AWS SSO ?
Warning
The factor to choose SSO or barely method is totally depend on your strategy which one apply for whole AWS Account and applications
In my perspective, bare method has good and problem, following the article from Cloudsoft - Everyone should be using AWS SSO. Here’s why, we can figure out
- Tactically, Bare IAM brings a fast way to access your account, but if organization does expand, it means your AWS Cloud has more than two accounts, the problem is now coming up in managing username and password.
- Next, the truth about bare IAM has a way to switch account with only account, but you need handle to control and access right account to switch between account in organization with specific role and permission, and ain’t gonna easy for this stuff.
- Big problem, when you scale up your organization, you can’t control over user, permission and it’s bringing up non-consistency and cause damage in secure for your organization.
Info
That why here the opportunity to AWS SSO become potential solution for adapting with any AWS organization, not only about techniques, secure but also the solution will bring more efficiency for manage AWS, costs and many reason to think about exchange. Explore more use cases to digest with SSO
If you use AWS SSO, you can have
- A single URL which is the gateway to all accounts in your organization.
- A directory in which you can assign usernames and passwords to users.
- A configuration which clearly maps users to groups, and maps groups to AWS accounts and permissions.
Note
You can see and control over mange activities of user access in AWS portal, or CLI for what ever but bare IAM can but not clearly than SSO, honestly.
How to enable AWS SSO
You need to access to AWS Management Account, It means you need to access the root account which supervise whole your AWS organization, for example

Now reach to search box, and find IAM Identity Center

Now click Enable button to enabling service
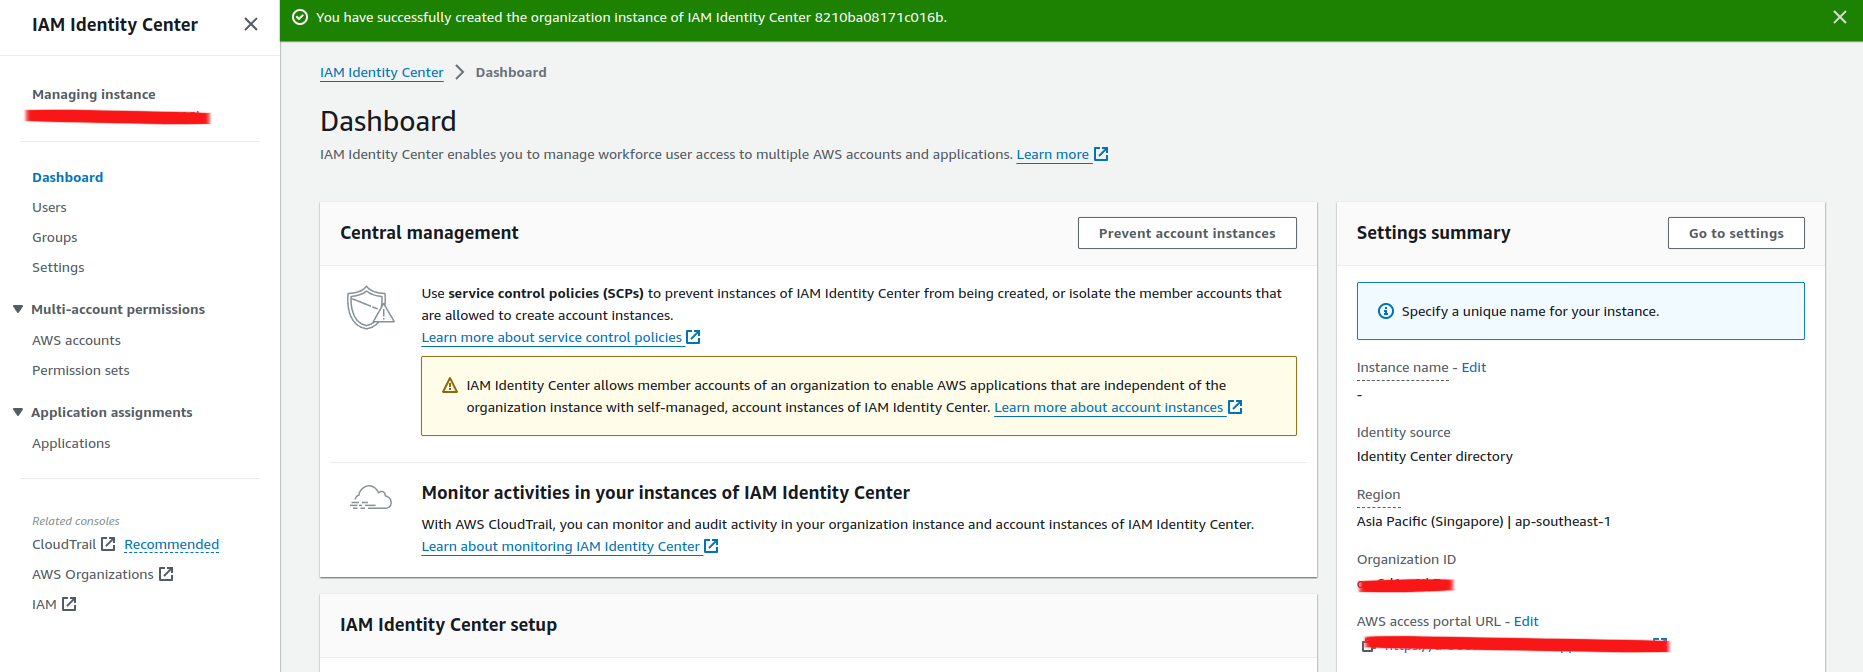
Let reach to second part, this is only step you need to handle manual on AWS Portal, and all of others step can covered by Terraform
Terraform Module Registry
If you go there, you ensure familiar with terraform, you can double check couple my blogs about this technology
- DevOps Training Session 7: Terraform
- DevOps Training Session 9 + 10: Cloud - Networking - AutoScaling VM
- Atlantis with ECS for automatic provisioning
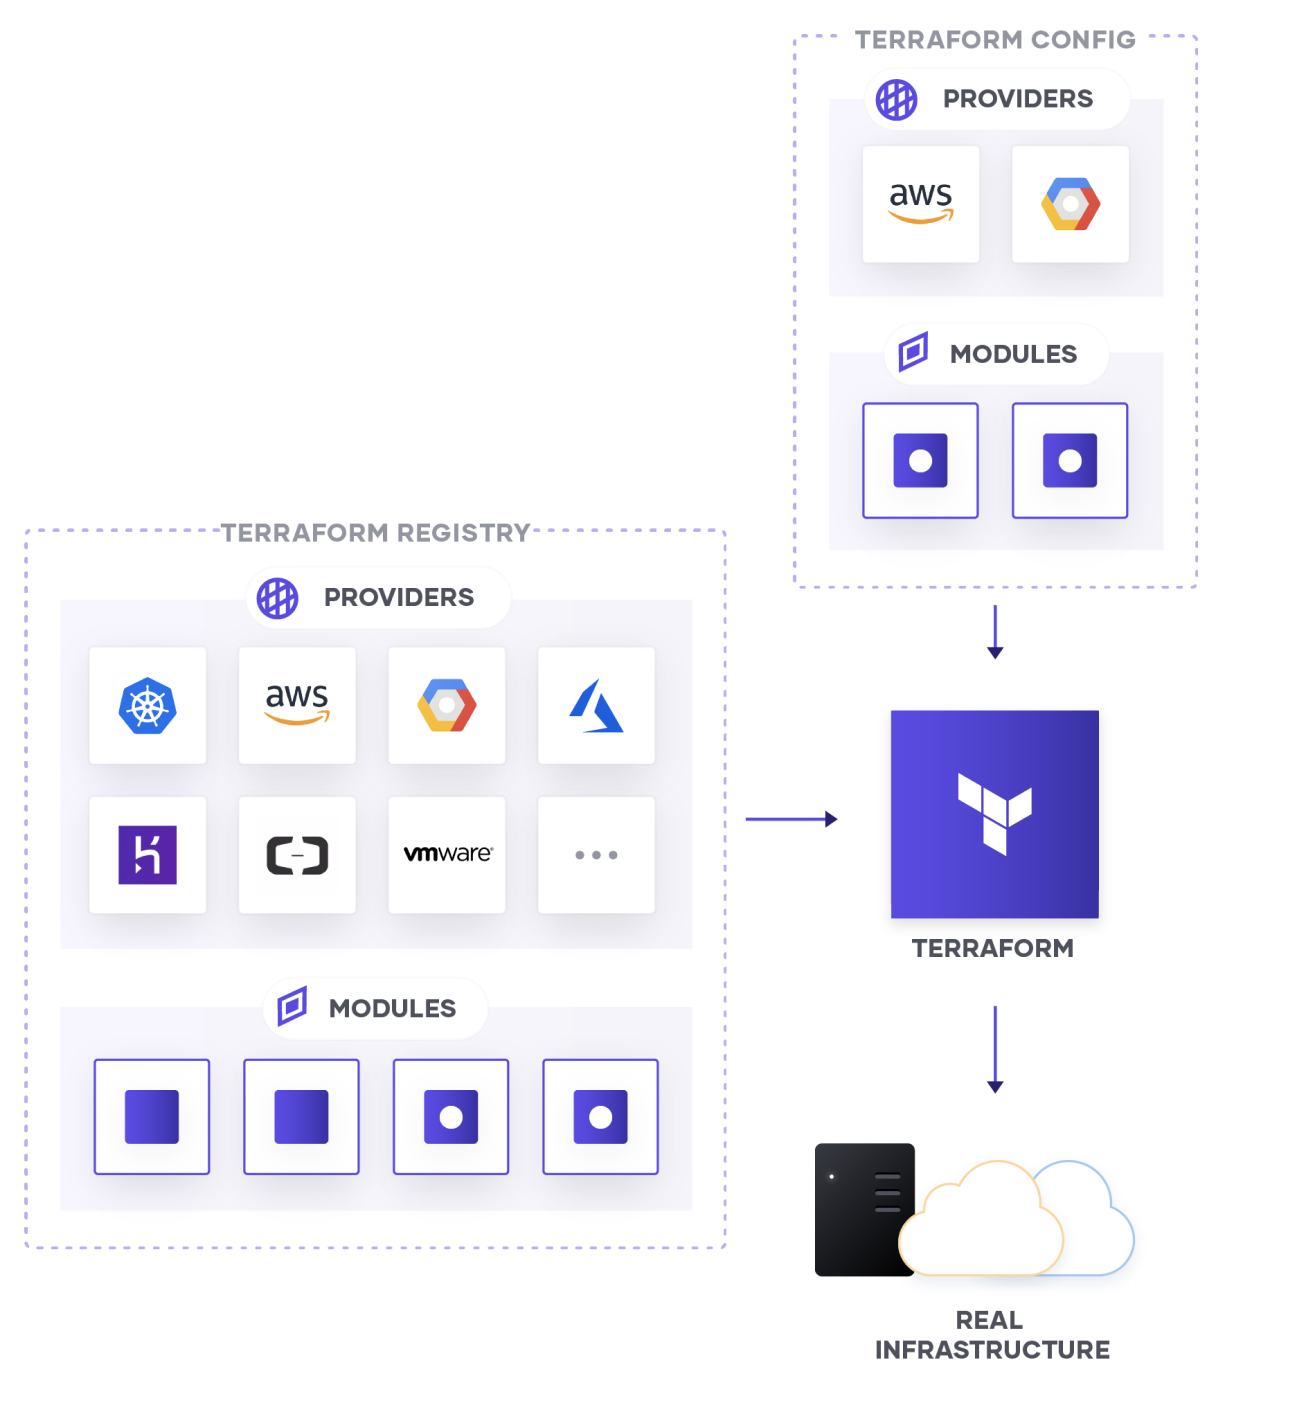
As you can see, terraform is using many block called module, It means whole provisioning progress is encapsulating inside the module, and exposing interface to help us call from remote, locally or what ever purpose you want
Question
The story begins about you need to figure out what place can help you keep that module, and provide the methodology to any people can try to pull and retrieve with your release remotely module, and Using Terraform Registry is one of the best solution of community
We have both solution open-source and profit to handle that, explore at Module Sources. There are many potential selection, such as
-
Terraform Registry (Free for community, Limited for release module ~500 module)
-
Github and BitBucket (Free but not good idea for store module)
	# Use github with HTTPS
	module "consul" {
	  source = "github.com/hashicorp/example"
	}

	# Use github with SSH
	module "consul" {
	  source = "git@github.com:hashicorp/example.git"
}-
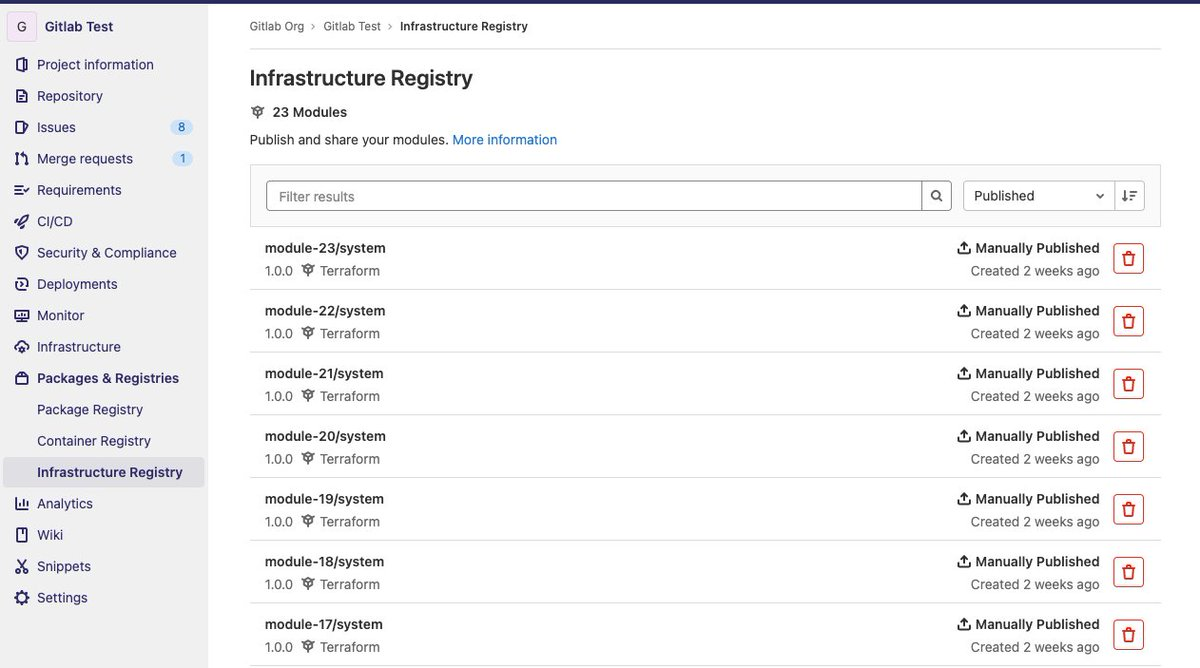
Gitlab (Super useful and work effective)
-
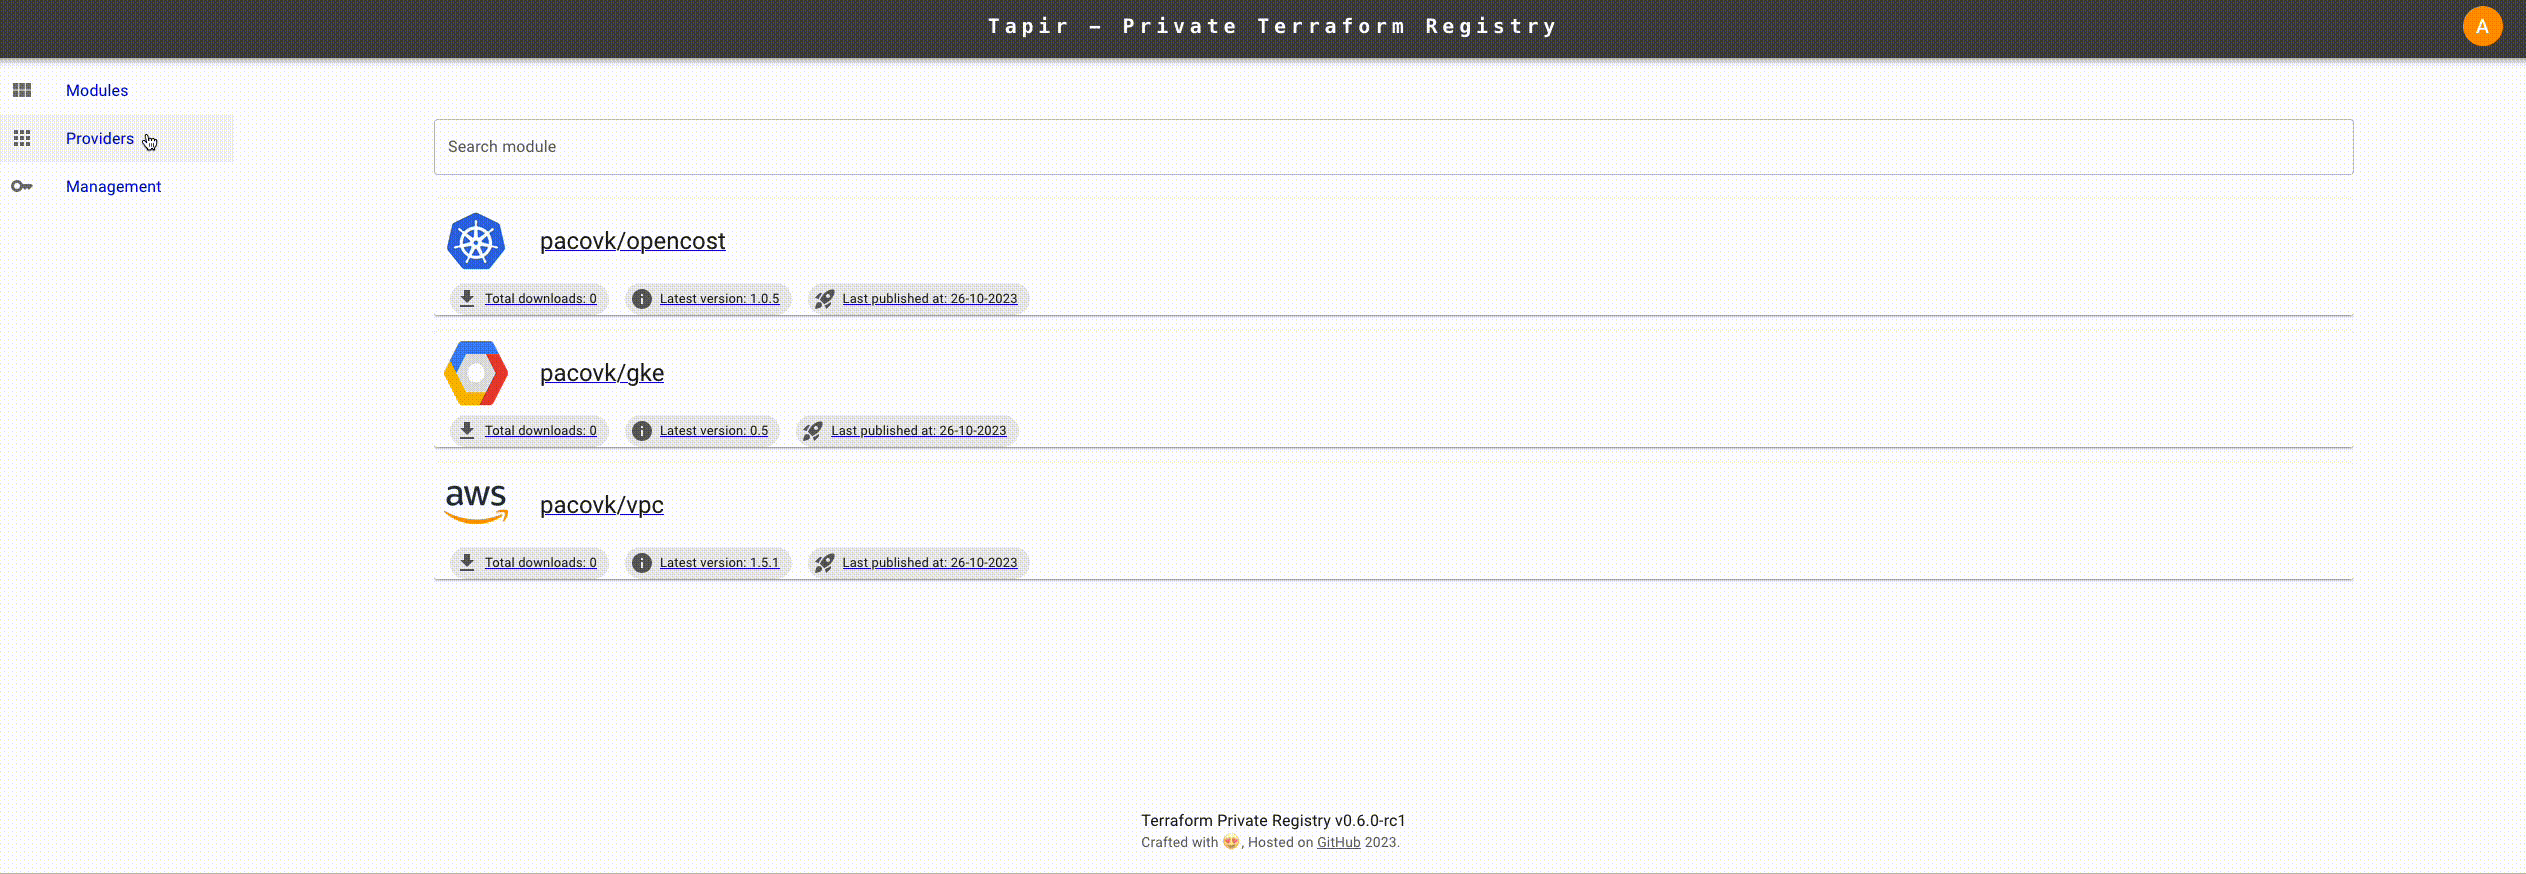
Furthermore, there are candidates stand out there, for free and private registry purpose tapir, Terrareg, … Read article and awesome-tf to exploring more
Note
In my perspective, you have more than one tool to hand on with purpose creating own registry, and those one will create competitive environment but honestly, I prefer to use
Gitlabwith automation release,gitopsand lot of stuff to you when try to do implementTerraformin this platform
Make for you own

Question
In this practice session of week, we will try to combine with creating AWS SSO module, building this one becomes public module, releasing with
Gitlab Terraform Registryand reusing to enhance in your AWS Account.
First of all start, I want to send my shout-out for people and community who inspired me this idea
- Bill Ngo - My Coworker
- Cloud Posse - Community to contribute useful module for AWS
- AWS Integration and Automation - Super detailing module
Quote
This build is not the first appearance, but with me this is first time I try to handle the practicing and I appreciate about it, totally experience
I will list the step need to do, and we will try to walk through to get best result of practice session
- Use Terraform with Gitlab provider to create template module with dynamically, you can use with Github or BitBucket ⇒ You will have structure of whole all
terraform-module, e.g terraform-example-module and generate with.prehookandterraform-docs - Provision AWS SSO module for supplying, base on iam-identity-center
- Setup the pipeline to generate module in
Gitlabto contribute your module - Reuse with your own implement
- Play with AWS SSO
Create a Terraform module template structure
With the inspiration, we are using Gitlab Provider to handling all of stuff, you just need to create PAT Token of Gitlab, and can digest with implement Terraform
To create PAT Token, you can follow this documentation with permission is API because you Terraform providers will call API to create your repository inside your account
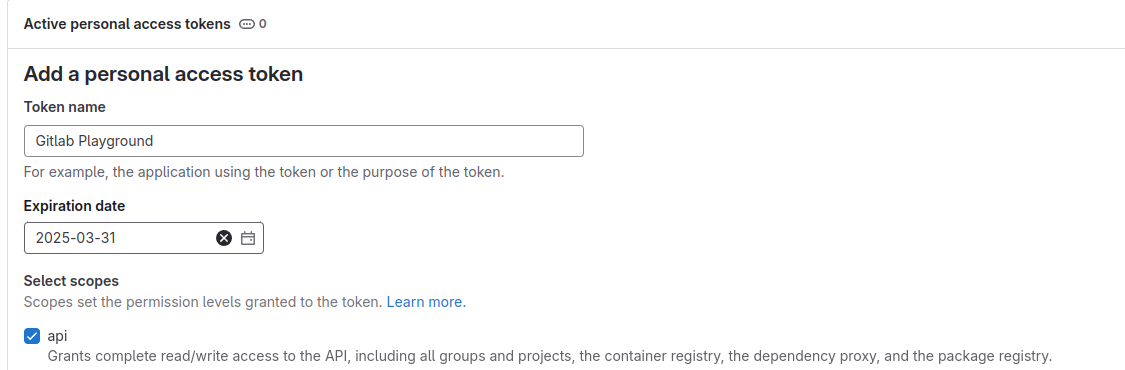
glpat-xxxxxxxxxxxxxxxxxxxNow you are having a token, next head to implement terraform and see what you have. First of all, let take a look the structure of terraform repositories
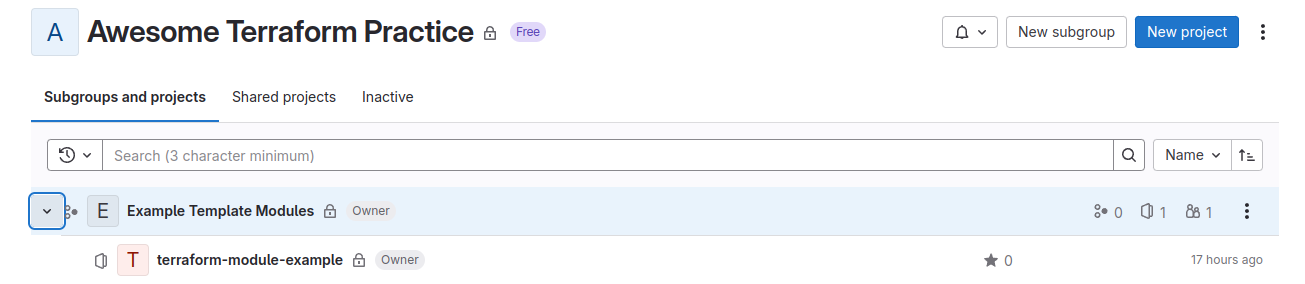
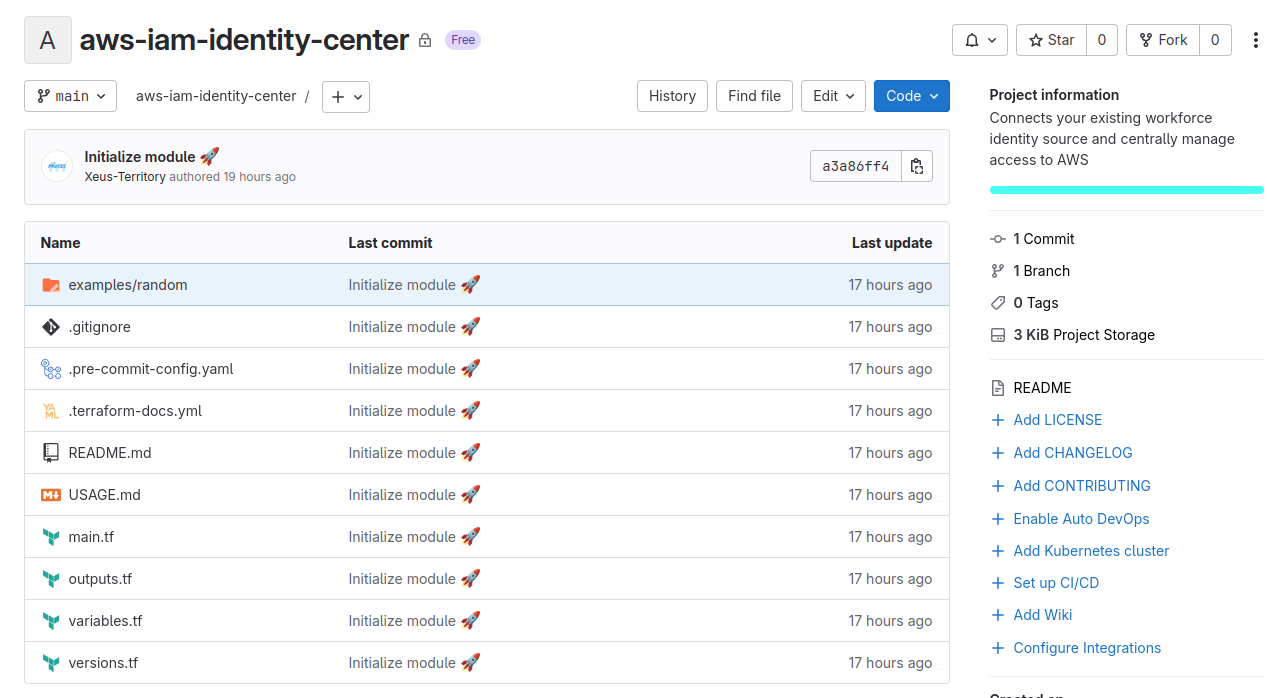
terraform-module-example
├── examples
│   └── random
│       ├── main.tf
│       ├── outputs.tf
│       ├── providers.tf
│       └── versions.tf
├── .gitignore
├── main.tf
├── outputs.tf
├── .pre-commit-config.yml
├── README.md
├── .terraform-docs.yml
├── USAGE.md
├── variables.tf
└── versions.tf

3 directories, 13 files
Afterward, I will go with you to detailing what you need to write inside those files
First of all, you need to add .gitignore for terraform project, and this work become important to prevent leak any data terraform. You can use .gitignore.io to create one for yourself
# Created by https://www.toptal.com/developers/gitignore/api/terraform
# Edit at https://www.toptal.com/developers/gitignore?templates=terraform

### Terraform ###
# Local .terraform directories
**/.terraform/*

# .tfstate files
*.tfstate
*.tfstate.*

# Crash log files
crash.log
crash.*.log

# Exclude all .tfvars files, which are likely to contain sensitive data, such as
# password, private keys, and other secrets. These should not be part of version
# control as they are data points which are potentially sensitive and subject
# to change depending on the environment.
*.tfvars
*.tfvars.json

# Ignore override files as they are usually used to override resources locally and so
# are not checked in
override.tf
override.tf.json
*_override.tf
*_override.tf.json

# Include override files you do wish to add to version control using negated pattern
# !example_override.tf

# Include tfplan files to ignore the plan output of command: terraform plan -out=tfplan
# example: *tfplan*

# Ignore CLI configuration files
.terraformrc
terraform.rc

# End of https://www.toptal.com/developers/gitignore/api/terraform
Next we reach to .pre-commit, so It’s really framework to help you implement the process before you commit your change into git. Explore more about .pre-commit, and with terraform .pre-commit does help you to formatting, and generate docs which provide a such great information with terraform-docs for your terraform repositories
To install pre-commit and terraform-docs, you can run
# pre-commit
pip install pre-commit # python < 3.12
# pipx install pre-commit # python >= 3.12

# terraform-docs
curl -sSLo ./terraform-docs.tar.gz https://terraform-docs.io/dl/v0.18.0/terraform-docs-v0.18.0-$(uname)-amd64.tar.gz
tar -xzf terraform-docs.tar.gz
chmod +x terraform-docs
sudo mv terraform-docs /usr/local/bin/
And now definition .pre-commit configuration file
fail_fast: true

repos:
  - repo: https://github.com/gruntwork-io/pre-commit
    rev: v0.1.23
    hooks:
      - id: terraform-fmt

  - repo: https://github.com/terraform-docs/terraform-docs
    rev: v0.18.0
    hooks:
      - id: terraform-docs-system
        args: ["markdown", "table", "."]
You can perform pre-commit install to query and install hook for your .git
# Install hook (NOTE: remember set up .git for your repo)
pre-commit install
So your .git will trigger that command after you try to run git commit to your upstream, next we will implement with *.tf to figure out what need to setup. Just a simple thing
resource "random_integer" "example" {
  min = 1
  max = 50000
  keepers = {
    example = var.example
  }
}

locals {
  example = format("%v %v", var.example, join("", random_integer.example[*].result))
}output "random_num" {
value = random_integer.example.result
description = "Generate integer number from 1 to 50000"
}variable "example" {
description = "Example variable"
default = "hello world"
}terraform {
required_version = ">= 1.5.0"
required_providers {
local = {
source = "hashicorp/local"
version = "2.5.2"
}
}
}If you can see examples directory, it just a example which create to use module, but just except it. For working terraform-docs, they recommend us to use configuration-file for working with this technology. You need to add .terraform-docs.yml into your example repository
formatter: "" # this is required

version: ""

header-from: main.tf
footer-from: ""

recursive:
  enabled: false
  path: modules
  include-main: true

sections:
  hide: []
  show: []

content: ""

output:
  file: "README.md"
  mode: inject

output-values:
  enabled: false
  from: ""

sort:
  enabled: true
  by: name

settings:
  anchor: true
  color: true
  default: true
  description: false
  escape: true
  hide-empty: false
  html: true
  indent: 2
  lockfile: true
  read-comments: true
  required: true
  sensitive: true
  type: true
This configuration file will generate information about your terraform module into README.md, and this will work cut off time for write module info, integrating into .pre-commit to prevent miss actions 😄
Alright, you can push that into your gitlab and take this for example template with one, and see result when run .pre-commit, okay
# git workflow
git add --all
git commit -m "Initialize module :rocket:"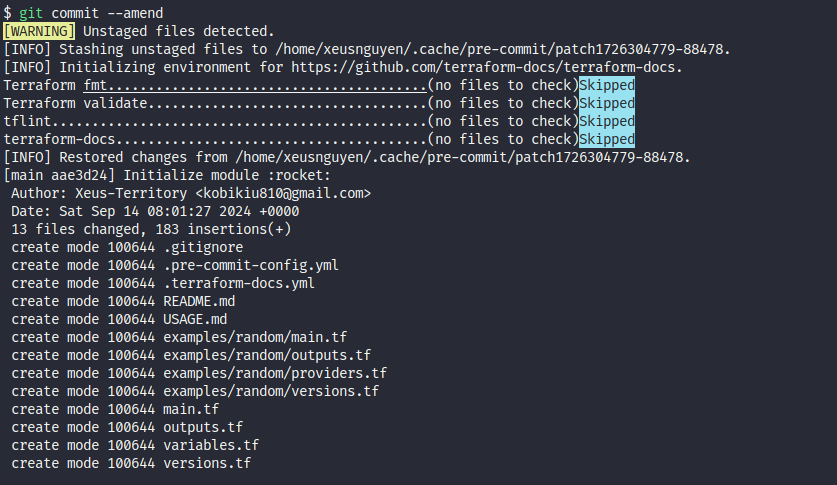
Next, we are moving on to use terraform with Gitlab provider to provisioning the multiple project base on template
Structure of terraform-gitlab-supply will include smt like this
terraform-gitlab-supply
├── backend.tf
├── .gitignore
├── main.tf
├── modules
│   ├── gitlab.tf
│   ├── variables.tf
│   └── versions.tf
├── .pre-commit-config.yaml
└── variables.tf

2 directories, 8 files
Let go to detail of each components, keep the same thing with .pre-commit-config.yaml file
locals {
  aws_modules = {
    iam-identity-center = "Connects your existing workforce identity source and centrally manage access to AWS"
  }
}

module "aws_modules" {
  for_each = local.aws_modules
  source   = "./modules"

  repo_name     = each.key
  description   = each.value
  provider_name = "aws"
}
Conclusion
- Create
aws-modulesbase onlocal.aws_modules - Provide
repo_nameanddescriptionintofor_each - Use from module
./modules
terraform {
  # Keep your tfstate in your machine (Individual purpose but if team purpose need to use remote .tfstate)
  backend "local" {

  }
  required_providers {
    gitlab = {
      source  = "gitlabhq/gitlab"
      version = ">= 17.2.0"
    }
  }
}

provider "gitlab" {
  token = var.GITLAB_TOKEN
}
Conclusion
- Keep
.tfstatein the local machine - Import provider
gitlabhq/gitlab
You need to provide add-on one file variables.tf to supply variable for gitlab with token
variable "GITLAB_TOKEN" {
  description = "Providing for gitlab providers to authentication"
  type        = string
  sensitive   = true
}
Next we head to provisioning inside module directory
locals {
  repo_name           = "${var.provider_name}-${var.repo_name}"
  template_project_id = "xxxxxxx" # project-template-id
}

resource "gitlab_project" "this" {
  count = var.create_repo ? 1 : 0

  name                = local.repo_name
  description         = var.description
  merge_method        = "merge"
  use_custom_template = true
  template_project_id = local.template_project_id

  lifecycle {
    prevent_destroy = true
  }
}
Conclusion
- Supply
localto set the name insidegitlab_projectresource prevent_destroyis enable to help you hard to destroy resource
variable "repo_name" {
  type = string
}

variable "provider_name" {
  type    = string
}

variable "description" {
  type    = string
  default = ""
}

variable "create_repo" {
  type    = bool
  default = true
}terraform {
required_version = ">= 1.5.0"
required_providers {
gitlab = {
source = "gitlabhq/gitlab"
version = ">= 17.2.0"
}
}
}Info
If you wonder why we need to put that
gitlabprovider in this location, the reason whygitlabprovider is not come fromhashicorpand it means when you try to runterraform init, absolutely you will receive the error because you are using providerpartnerof Terraform
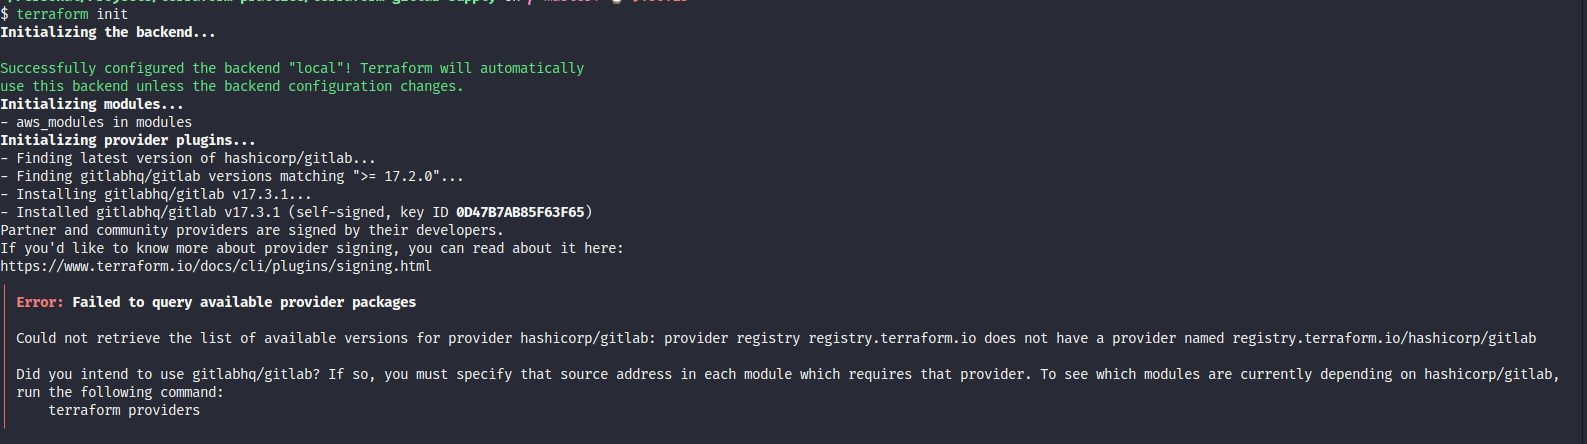
And when you add the definition about gitlabhq/gitlab, your error is gone
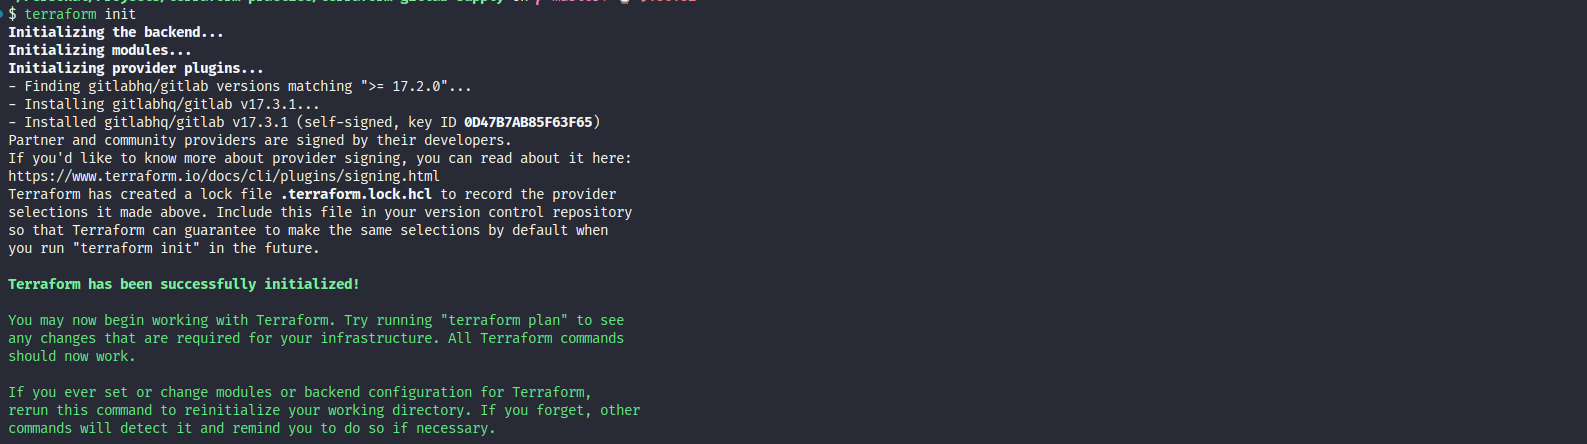
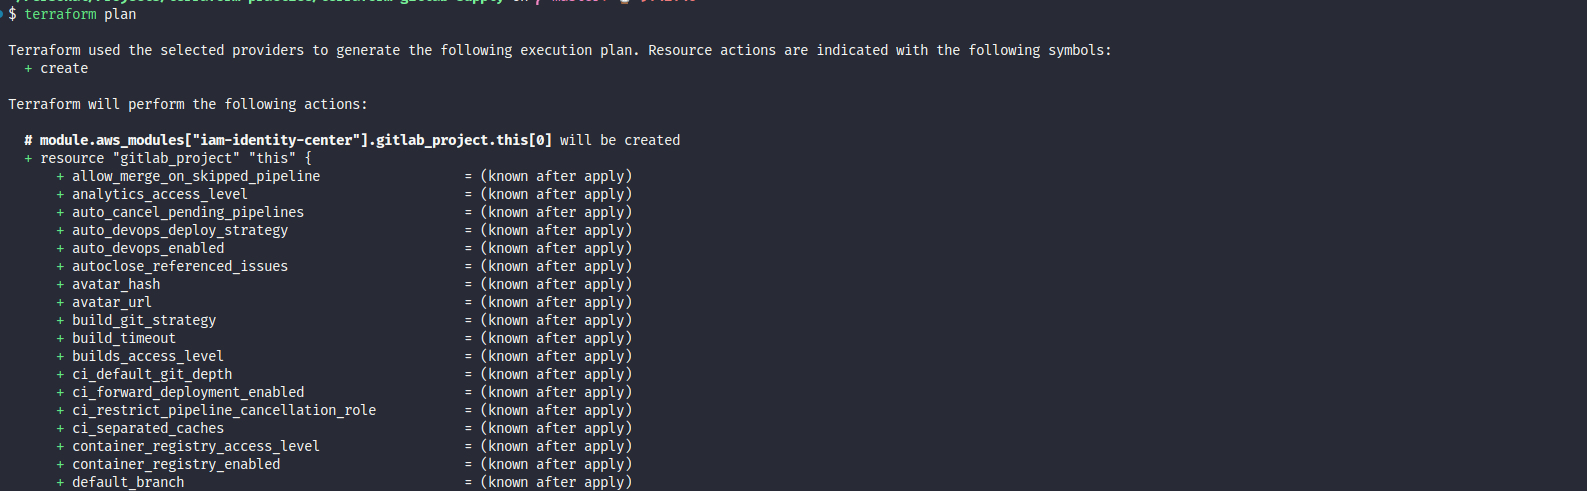
Now run terraform workflow to get the result in creation repositories inside your gitlab
# Retrieve the module and package
terraform init
# Get the plan
terraform plan
# Apply the plan
terraform apply
But remember you have GITLAB_TOKEN to setting, many method you can use to handle it
- Export environment variable with prefix of terraform (Recommend for CI/CD)
- Use terraform.tfvars file (Recommend when run local)
- Prompt the result when
terraformask you (It’s on you bruh 😄)
To not miss, I try to add teraform.tfvars into root terraform project directory
touch terraform.tfvars
echo "GITLAB_TOKEN = \"glpat-xxxxxxxxxxxxxxxxxxx\"" >> terraform.tfvars
Now run plan to get the output result
Check and validate, now run apply to get the result, and error back to reason they tell about we need group to exchange our template become customize template, issue link. So we create group and move your repository to group at Tutorial: Move your personal project to a group
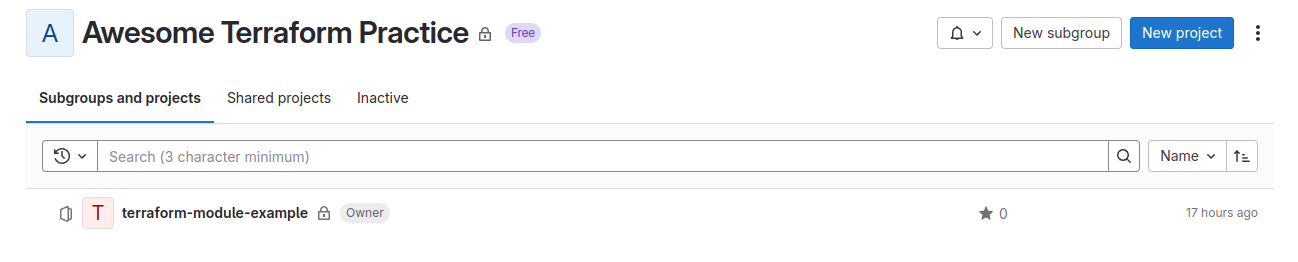
Next, we need add sub-group where you store module because if you miss this stuff, that gonna error continuous
Alright, you modify your gitlab.tf and we gonna ready to create repository
locals {
  repo_name           = "${var.provider_name}-${var.repo_name}"
  template_project_id = "xxxxxxxx" # ID of the template project
}

resource "gitlab_project" "this" {
  count = var.create_repo ? 1 : 0

  name                            = local.repo_name
  description                     = var.description
  merge_method                    = "merge"
  use_custom_template             = true
  template_project_id             = local.template_project_id
  group_with_project_templates_id = "xxxxxxxx" # Group ID with template in, is subgroup of Namespace Group (not the same as Namespace ID)
  namespace_id                    = "xxxxxxxx" # Group ID to create project in

  lifecycle {
    prevent_destroy = true
  }
}
Apply again, and your project is created
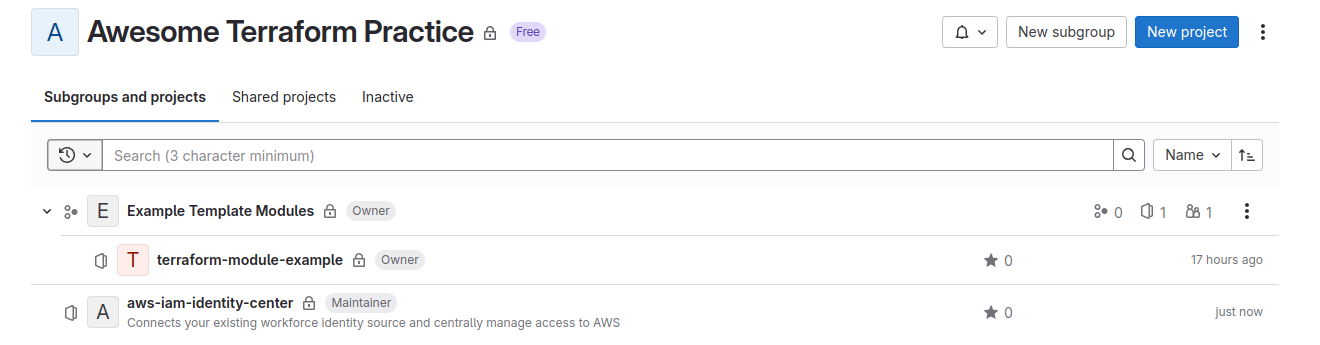
Provision AWS SSO module for supplying
Like I told about plan, we need to create module and inject into our organization remotely, and here is the thing we should handle in this practice session.
Take a look some cool stuff to adapt your idea
- iam-identity-center - Provided by aws-ia-ci
- sso-group - Provided by trussworks
First of all, the module will take structure like terraform-module-example, because it’s clone 😄. But the difference about it use for implement AWS SSO module, and this code is mostly depend on iam-identity-center and it’s supply incredible feature, including
- Create a new group SSO with dynamic functionality
- Create a new user SSO with dynamic functionality
- Create a Group membership with dynamic functionality
- Create an SSO Permission Set with dynamic functionality
We will move to detail for whole module
# Create a new group sso with dynamic functionality
resource "aws_identitystore_group" "sso_groups" {
  for_each          = var.sso_groups == null ? {} : var.sso_groups
  identity_store_id = local.sso_instance_id
  display_name      = each.value.group_name
  description       = each.value.group_description
}

# Create a new user sso with dynamic functionality
resource "aws_identitystore_user" "sso_users" {
  for_each          = var.sso_users == null ? {} : var.sso_users
  identity_store_id = local.sso_instance_id

  # Require block for creation
  display_name = each.value.display_name != null ? each.value.display_name : join(" ", [each.value.given_name, each.value.family_name])
  user_name    = each.value.user_name

  name {
    // (Required) First name
    given_name = each.value.given_name
    // (Optional) Middle name
    middle_name = each.value.middle_name
    // (Required) Last name
    family_name = each.value.family_name
    // Default value is the provided given name and family name.
    formatted = each.value.name_formatted != null ? each.value.name_formatted : join(" ", [each.value.given_name, each.value.family_name])
    // Default value is null.
    honorific_prefix = each.value.honorific_prefix
    // Default value is null.
    honorific_suffix = each.value.honorific_suffix
  }

  emails {
    // (Required) The email address. This value must be unique across the identity store.
    // Required for this module as explained above.
    value = each.value.email
    //(Optional) When true, this is the primary email associated with the user.
    // Default value is true.
    primary = each.value.is_primary_email
    // (Optional) The type of email.
    // Default value is null.
    type = each.value.email_type
  }
}

# Create a Group membership with dynamic functionality
resource "aws_identitystore_group_membership" "sso_group_membership" {
  for_each          = local.users_and_their_groups
  identity_store_id = local.sso_instance_id
  group_id          = (contains(local.this_groups, each.value.group_name) ? aws_identitystore_group.sso_groups[each.value.group_name].group_id : data.aws_identitystore_group.existing_sso_groups[each.value.group_name].group_id)
  member_id         = (contains(local.this_users, each.value.user_name) ? aws_identitystore_user.sso_users[each.value.user_name].user_id : data.aws_identitystore_user.existing_sso_users[each.value.user_name].user_id)
}

# - SSO Permission Set -
resource "aws_ssoadmin_permission_set" "pset" {
  for_each = var.permission_sets
  name     = each.key

  # lookup function retrieves the value of a single element from a map, when provided it's key.
  # if the given key does not exist, the default value (null) is returned instead

  instance_arn     = local.ssoadmin_instance_arn
  description      = lookup(each.value, "description", null)
  relay_state      = lookup(each.value, "relay_state", null)      // (Optional) URL used to redirect users within the application during the federation authentication process
  session_duration = lookup(each.value, "session_duration", null) // The length of time that the application user sessions are valid in the ISO-8601 standard
  tags             = lookup(each.value, "tags", {})
}

# - AWS Managed Policy Attachment -
resource "aws_ssoadmin_managed_policy_attachment" "pset_aws_managed_policy" {
  # iterate over the permission_sets map of maps, and set the result to be pset_name and pset_index
  # ONLY if the policy for each pset_index is valid.
  for_each = { for pset in local.pset_aws_managed_policy_maps : "${pset.pset_name}.${pset.policy_arn}" => pset }

  instance_arn       = local.ssoadmin_instance_arn
  managed_policy_arn = each.value.policy_arn
  permission_set_arn = aws_ssoadmin_permission_set.pset[each.value.pset_name].arn

  depends_on = [aws_ssoadmin_account_assignment.account_assignment]
}

# - AWS SSO Admin Account Assignment -
resource "aws_ssoadmin_account_assignment" "account_assignment" {
  for_each = local.principals_and_their_account_assignments // for_each arguement must be a map, or set of strings. Tuples won't work

  instance_arn       = local.ssoadmin_instance_arn
  permission_set_arn = contains(local.this_permission_sets, each.value.permission_set) ? aws_ssoadmin_permission_set.pset[each.value.permission_set].arn : data.aws_ssoadmin_permission_set.existing_permission_sets[each.value.permission_set].arn

  principal_type = each.value.principal_type

  # Conditional use of resource or data source to reference the principal_id depending on if the principal_type is "GROUP" or "USER" and if the principal_idp is "INTERNAL" or "EXTERNAL". "INTERNAL" aligns with users or groups that were created with this module and use the default IAM Identity Store as the IdP. "EXTERNAL" aligns with users or groups that were created outside of this module (e.g. via external IdP such as EntraID, Okta, Google, etc.) and were synced via SCIM to IAM Identity Center.

  principal_id = each.value.principal_type == "GROUP" && each.value.principal_idp == "INTERNAL" ? aws_identitystore_group.sso_groups[each.value.principal_name].group_id : (each.value.principal_type == "USER" && each.value.principal_idp == "INTERNAL" ? aws_identitystore_user.sso_users[each.value.principal_name].user_id : (each.value.principal_type == "GROUP" && each.value.principal_idp == "EXTERNAL" ? data.aws_identitystore_group.existing_sso_groups[each.value.principal_name].group_id : (each.value.principal_type == "USER" && each.value.principal_idp == "EXTERNAL" ? data.aws_identitystore_user.existing_sso_users[each.value.principal_name].user_id : null)))

  target_id   = each.value.account_id
  target_type = "AWS_ACCOUNT"
}# Fetch information about the existing SSO Instance
data "aws_ssoadmin_instances" "instance" {}
# Fetch existing AWS Organization
data "aws_organizations_organization" "organization" {}
# - Fetch of SSO Groups (externally defined) to be used for group membership assignment -
data "aws_identitystore_group" "existing_sso_groups" {
for_each = var.existing_sso_groups
identity_store_id = local.sso_instance_id
alternate_identifier {
unique_attribute {
attribute_path = "DisplayName"
attribute_value = each.value.group_name
}
}
}
# - Fetch of SSO Users (externally defined) to be used for group membership assignment -
data "aws_identitystore_user" "existing_sso_users" {
for_each = var.existing_sso_users
identity_store_id = local.sso_instance_id
alternate_identifier {
# Filter users by user_name (nuzumaki, suchiha, dovis, etc.)
unique_attribute {
attribute_path = "UserName"
attribute_value = each.value.user_name
}
}
}
# - Fetch of Permissions sets (externally defined) to be used for account assignment -
data "aws_ssoadmin_permission_set" "existing_permission_sets" {
for_each = var.existing_permission_sets
instance_arn = local.ssoadmin_instance_arn
name = each.value.permission_set_name
}# - Users and Groups -
locals {
# Create a new local variable by flattening the complex type given in the variable "sso_users"
flatten_user_data = flatten([
for this_user in keys(var.sso_users) : [
for group in var.sso_users[this_user].group_membership : {
user_name = var.sso_users[this_user].user_name
group_name = group
}
]
])
users_and_their_groups = {
for s in local.flatten_user_data : format("%s_%s", s.user_name, s.group_name) => s
}
}
# - Permission Sets and Policies -
locals {
# - Fetch SSO Instance ARN and SSO Instance ID -
ssoadmin_instance_arn = tolist(data.aws_ssoadmin_instances.instance.arns)[0]
sso_instance_id = tolist(data.aws_ssoadmin_instances.instance.identity_store_ids)[0]
# Iterate over the objects in var.permission sets, then evaluate the expression's 'pset_name'
# and 'pset_index' with 'pset_name' and 'pset_index' only if the pset_index.managed_policies (AWS Managed Policy ARN)
# produces a result without an error (i.e. if the ARN is valid). If any of the ARNs for any of the objects
# in the map are invalid, the for loop will fail.
# pset_name is the attribute name for each permission set map/object
# pset_index is the corresponding index of the map of maps (which is the variable permission_sets)
aws_managed_permission_sets = { for pset_name, pset_index in var.permission_sets : pset_name => pset_index if can(pset_index.aws_managed_policies) }
# - AWS Managed Policies -
pset_aws_managed_policy_maps = flatten([
for pset_name, pset_index in local.aws_managed_permission_sets : [
for policy in pset_index.aws_managed_policies : {
pset_name = pset_name
policy_arn = policy
} if pset_index.aws_managed_policies != null && can(pset_index.aws_managed_policies)
]
])
}
# - Account Assignments -
locals {
# Create a new local variable by flattening the complex type given in the variable "account_assignments"
# This will be a 'tuple'
flatten_account_assignment_data = flatten([
for this_assignment in keys(var.account_assignments) : [
for account in var.account_assignments[this_assignment].account_ids : [
for pset in var.account_assignments[this_assignment].permission_sets : {
permission_set = pset
principal_name = var.account_assignments[this_assignment].principal_name
principal_type = var.account_assignments[this_assignment].principal_type
principal_idp = var.account_assignments[this_assignment].principal_idp
account_id = length(regexall("[0-9]{12}", account)) > 0 ? account : null
}
]
]
])
# Convert the flatten_account_assignment_data tuple into a map.
# Since we will be using this local in a for_each, it must either be a map or a set of strings
principals_and_their_account_assignments = {
for s in local.flatten_account_assignment_data : format("Type:%s__Principal:%s__Permission:%s__Account:%s", s.principal_type, s.principal_name, s.permission_set, s.account_id) => s
}
# List of permission sets, groups, and users that are defined in this module
this_permission_sets = keys(var.permission_sets)
this_groups = [
for group in var.sso_groups : group.group_name
]
this_users = [
for user in var.sso_users : user.user_name
]
}# Groups
variable "sso_groups" {
description = "Names of the groups you wish to create in IAM Identity Center."
type = map(object({
group_name = string
group_description = optional(string, null)
}))
default = {}
}
variable "existing_sso_groups" {
description = "Names of the existing groups that you wish to reference from IAM Identity Center."
type = map(object({
group_name = string
}))
default = {}
}
# Users
variable "sso_users" {
description = "Names of the users you wish to create in IAM Identity Center."
type = map(object({
display_name = optional(string)
user_name = string
group_membership = list(string)
# Name
given_name = string
middle_name = optional(string, null)
family_name = string
name_formatted = optional(string)
honorific_prefix = optional(string, null)
honorific_suffix = optional(string, null)
# Email
email = string
email_type = optional(string, null)
is_primary_email = optional(bool, true)
}))
default = {}
validation {
condition = alltrue([for user in values(var.sso_users) : length(user.user_name) > 1 && length(user.user_name) <= 128])
error_message = "The name of one of the defined IAM Identity Store (SSO) Users is too long. User_names can be a maxmium of 128 characters. Please ensure all user_names are 100 characters or less, and try again."
}
}
variable "existing_sso_users" {
description = "Names of the existing users that you wish to reference from IAM Identity Center."
type = map(object({
user_name = string
group_membership = optional(list(string), null) // only used if your IdP only syncs users, and you wish to manage which groups they should go in
}))
default = {}
}
# Permission Sets
variable "permission_sets" {
description = "Permission Sets that you wish to create in IAM Identity Center. This variable is a map of maps containing Permission Set names as keys. See permission_sets description in README for information about map values."
type = any
default = {}
}
variable "existing_permission_sets" {
description = "Names of the existing permission_sets that you wish to reference from IAM Identity Center."
type = map(object({
permission_set_name = string
}))
default = {}
}
# Account Assignments
variable "account_assignments" {
description = "List of maps containing mapping between user/group, permission set and assigned accounts list. See account_assignments description in README for more information about map values."
type = map(object({
principal_name = string
principal_type = string
principal_idp = string # acceptable values are either "INTERNAL" or "EXTERNAL"
permission_sets = list(string)
account_ids = list(string)
}))
default = {}
}And now you have done setup and implement entire the aws-iam-sso module with providing us those features above.
Create pipeline to generate module in Gitlab

As you remember in top of this topic, I just relate about gitlab where is a good place to put your module as remotely with same purpose with terraform registry and totally free. Therefore, I will guide you to handle that one. Read again documentation at Terraform Module Registry and you have multiple method to handle that
Following the documentation, they recommend us to using ci/cd and I think that great idea because we can cut off the time with template is build before from gitlab team
To handle pipeline, you need to add .gitlab-ci.yml into your root terraform module
include:
  template: Terraform-Module.gitlab-ci.yml

variables:
  TERRAFORM_MODULE_SYSTEM: aws
See, that look is very easily because whole step is writing from template of gitlab, you can find out the method to handle that via Use template with GitlabCI blog. The list of steps write inside these file (Take a look)
You can choose one of theme and version I use in this practice with first option, because that first template is depend on second template, make them clear but get the fully option. But remember, you have four variables that can exchange to make sure that compatible with your release, including
TERRAFORM_MODULE_DIR(Default:${CI_PROJECT_DIR}) - The relative path to the root directory of the Terraform project.TERRAFORM_MODULE_NAME(Default:${CI_PROJECT_NAME}) - The name of your Terraform module. Must not contain any spaces or underscores.TERRAFORM_MODULE_SYSTEM(Default:local) - The system or provider of your Terraform module targets. For example, local, aws, google.TERRAFORM_MODULE_VERSION(Default:${CI_COMMIT_TAG}) - The Terraform module version. You should follow the semantic versioning specification.
Pipeline will split into three step - with two scenarios
Info
3 Steps
fmt- Validate the formatting of the Terraform module.kics-iac-sast- Test the Terraform module for security issues.deploy- For tag pipelines only. Deploy the Terraform module to the Terraform Module Registry.2 scenarios
- Merge from
branchtomain⇒ Triggerkisc-iac-satsjob- Only
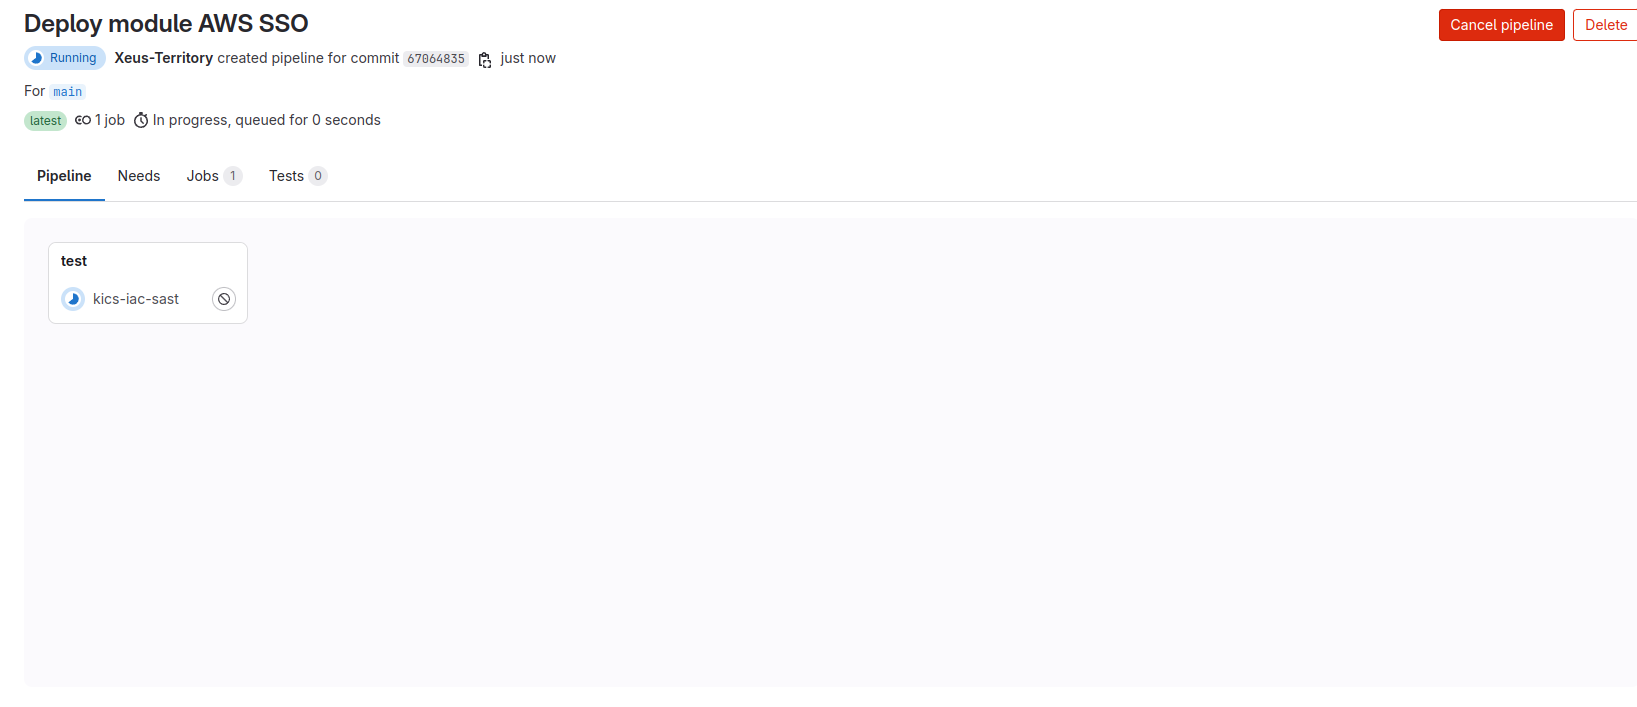
main⇒ Triggerkisc-iac-satsfor branch ⇒ Triggerdeployfor tag version
Technically, It’s really complex right, but you need to make familiar with this stuff, and practice with gitlab is super fun.
If you notice about deploy description, that tell you about tag, and it forces you to use tag to release your module to trigger deploy 😄. I think you should need it to handling this stuff
Quote
I will run slow step by step to helping you figure out what need to on next time
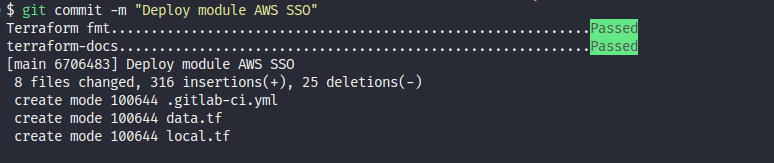
First of all, plz add the .pre-commit to not mizz anything else before commit 😄
pre-commit installSecondly, I choose scenario 2, therefore, I push directly commit to main branch to run deploy and first step you need to create commit with include whole of change
git add --all
git commit -m "message you want"
Info
Remember, you add
.precommithook in your project, so you need to validate all stuff and.prehookwill make a change to help you reduce step you skip, therefore you just need to preform twice command again to reduce to bypass all step
 Thirdly, You need to set the
 tag for your release, through command
# First get your main commit sha
git log --oneline # for e.g: 6706483

# Next you git tag to assign tag version to this commit
git tag -a 0.0.1 -m "Release first take for AWS SSO module" 6706483

# Review your git tag
git tag

# View detail change in tag
git show tag-name
After check and validate, now you need push your commit with tag to remote branch
git push -u origin main --tags 0.0.1Go to gitlab and see the result, now
 In some situation, you will meet this problem in release

Warning
If you meet some stuff about
git tag, read this issue to help you rename and remove tag or update old to new
git tag new old           # Create a new local tag named `new` from tag `old`.
git tag -d old            # Delete local tag `old`.
git push origin new :old  # Push `new` to your remote named "origin", and delete tag `old` on origin (by pushing an empty tag name to it).
Info
Because I set
v0.0.1instead of for0.0.1and make fail for module, some situation your release ingitlabwith not work for module versionv0.0.1, therefore just fix my mistake
And check again

Successfully, now you can review your module with choosing Operate ⇒ Terraform modules
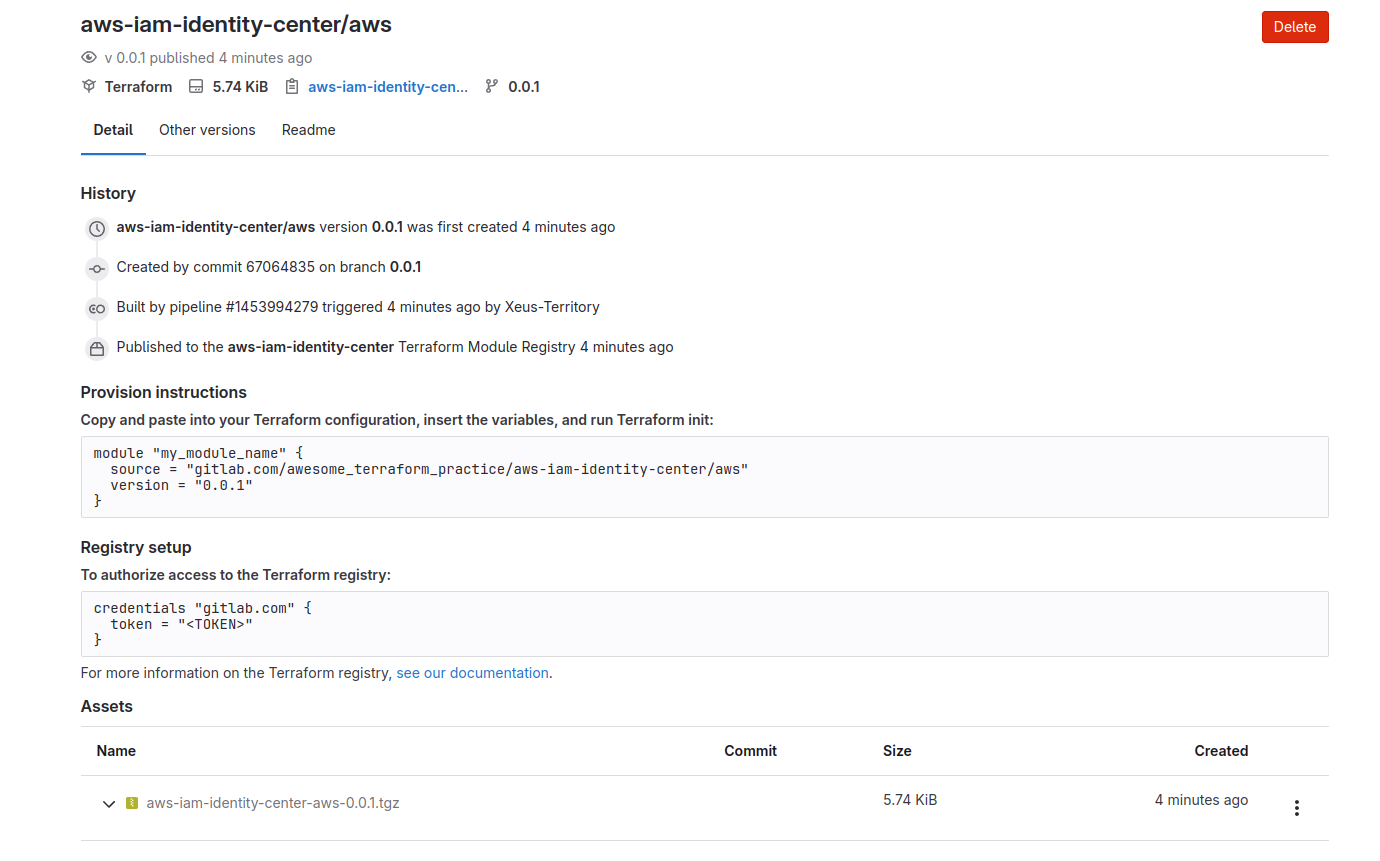
Info
You got it, your own aws module and contribute for your teammate 🙌🙌
Reuse with your AWS SSO module
To reuse this module, first of all you need to configure your terraform with retrieve your Gitlab PAT inside .terraformrc
First of all, create ~/.terraformrc in your Mac/Linux machine or %APPDATA%/terraform.rc in your windows machine
touch .terraformrc ~/.terraformrcNow edit that with content
credentials "gitlab.com" {
  token = "<TOKEN>"
}
Alright, now you can reuse this module from your local machine 🥶🥶. Now we try to define it with
module "sso_identity" {
  source = "gitlab.com/awesome_terraform_practice/aws-iam-identity-center/aws"
  version = "0.0.1"

  sso_groups = {
    Admin = {
      group_name        = "Admin"
      group_description = "Admin IAM Identity Center Group"
    },
    Dev = {
      group_name        = "Dev"
      group_description = "Dev IAM Identity Center Group"
    }
  }

  sso_users = {
    "xeus.ng" = {
      group_membership = ["Admin", "Dev"]
      user_name        = "xeus.ng"
      given_name       = "xeus"
      family_name      = "nguyen"
      display_name     = "xeus nguyen"
      email            = "example@example.com"
    }
  }

  // Create permissions sets backed by AWS managed policies
  permission_sets = {
    AdministratorAccess = {
      description          = "Provides AWS full access permissions.",
      session_duration     = "PT4H", // how long until session expires - this means 4 hours. max is 12 hours
      aws_managed_policies = ["arn:aws:iam::aws:policy/AdministratorAccess"]
      tags                 = { ManagedBy = "Terraform" }
    },
    ViewOnlyAccess = {
      description          = "Provides AWS view only permissions.",
      session_duration     = "PT3H", // how long until session expires - this means 3 hours. max is 12 hours
      aws_managed_policies = ["arn:aws:iam::aws:policy/job-function/ViewOnlyAccess"]
      tags                 = { ManagedBy = "Terraform" }
    }
  }
  // Assign users/groups access to accounts with the specified permissions
  account_assignments = {
    Admin = {
      principal_name  = "Admin"                                   # name of the user or group you wish to have access to the account(s)
      principal_type  = "GROUP"                                   # entity type (user or group) you wish to have access to the account(s). Valid values are "USER" or "GROUP"
      principal_idp   = "INTERNAL"                                # type of Identity Provider you are using. Valid values are "INTERNAL" (using Identity Store) or "EXTERNAL" (using external IdP such as EntraID, Okta, Google, etc.)
      permission_sets = ["AdministratorAccess", "ViewOnlyAccess"] // permissions the user/group will have in the account(s)
      account_ids = [                                             // account(s) the group will have access to. Permissions they will have in account are above line
        "xxxxxxxx"
      ]
    },
    Dev = {
      principal_name  = "Dev"
      principal_type  = "GROUP"
      principal_idp   = "INTERNAL" # type of Identity Provider you are using. Valid values are "INTERNAL" (using Identity Store) or "EXTERNAL" (using external IdP such as EntraID, Okta, Google, etc.)
      permission_sets = ["ViewOnlyAccess"]
      account_ids = [
        "xxxxxxxx"
      ]
    }
  }
}
terraform {
  required_version = ">= 1.5.0"
  required_providers {
    aws = {
      version = "5.67.0"
      source  = "hashicorp/aws"
    }
  }
  backend "local" {
  }
}
Go to IAM of your aws account, generate access_token with admin permission and export that into machine environment variable
export AWS_ACCESS_KEY_ID=xxxxx
export AWS_SECRET_ACCESS_KEY=xxxx
export AWS_DEFAULT_REGION=xxxx
And check with command
aws sts get-caller-identityAfter that, you just need to trigger terraform workflow to get the result
# Retrieve the module and package
terraform init
# Get the plan
terraform plan
# Apply the plan
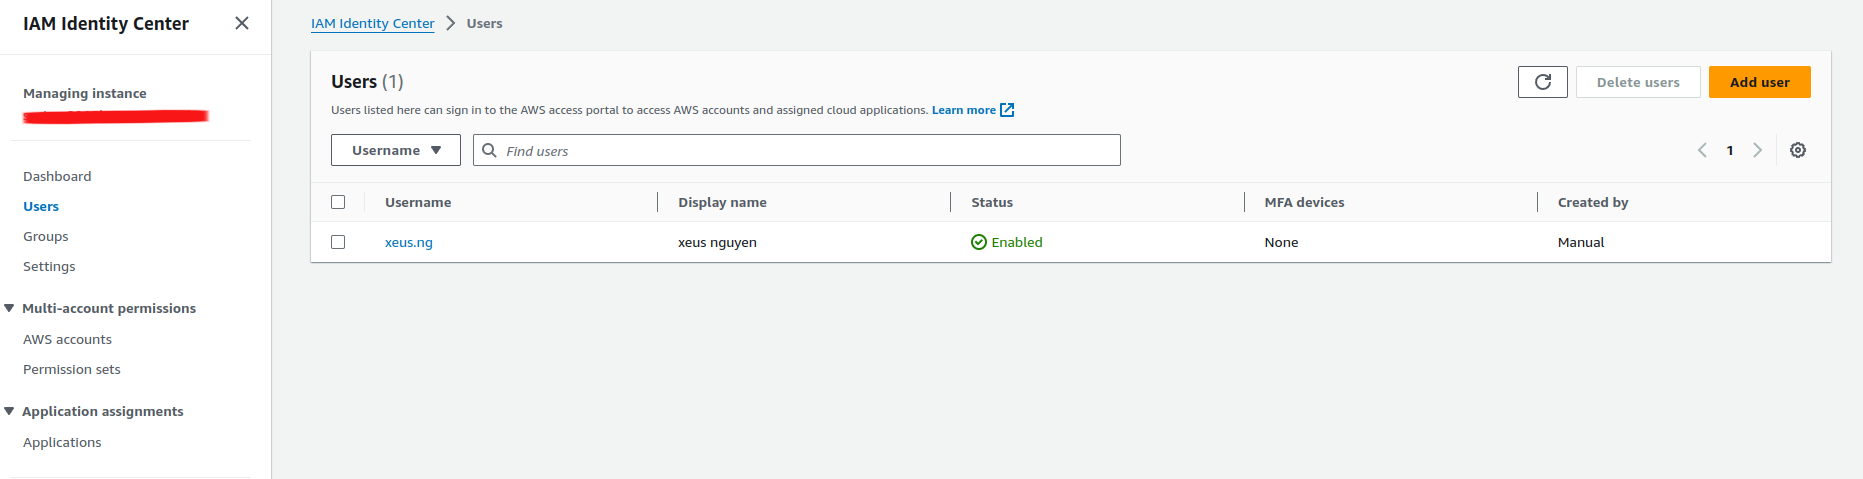
terraform applyBack to IAM Identity Center in AWS portal, you can see sso user is adding to
Play with AWS SSO
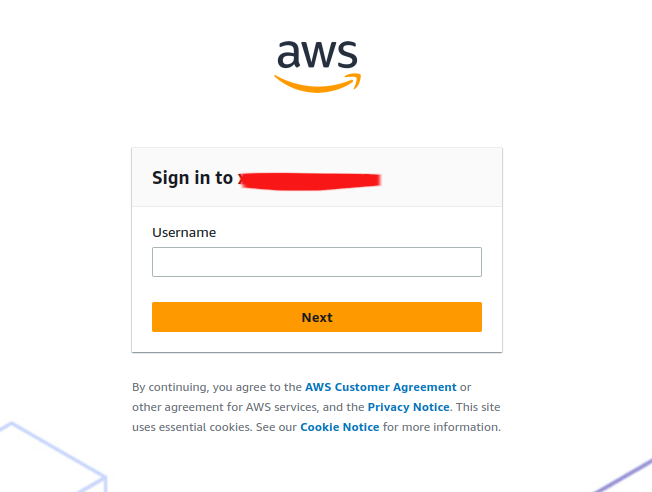
Now first of all you need to retrieve the portal of SSO, you need head to homepage of IAM identity center and take the look in Settings summary part, you can see AWS access portal URL (NOTE: edit if you want)
Now access to AWS SSO Portal, you will have the UI like this
In this time, you need to request DevOps or Root account in AWS export to your pass to first login into this portal, but remember
Warning
Send the email for SSO user to validate account that before receive the best feature from AWS SSO
Now, you are having two plan for reset password for user
- Click
Reset Passwordbutton in AWS portal, and send email reset password or generate one time password (NOTE: This password will provide and change after user login into the system) - User need click to
forgot passwordin AWS SSO Portal, and send the email for reset the password
After your user login into SSO, you need to add-on authentication method with theses option

With me Authentication App is the best option, but if you have multiple device for other option, go for it and receive more protection, 100%
And when you add authentication successfully, you will head on to AWS access portal with provide the best option to hand on with AWS Account
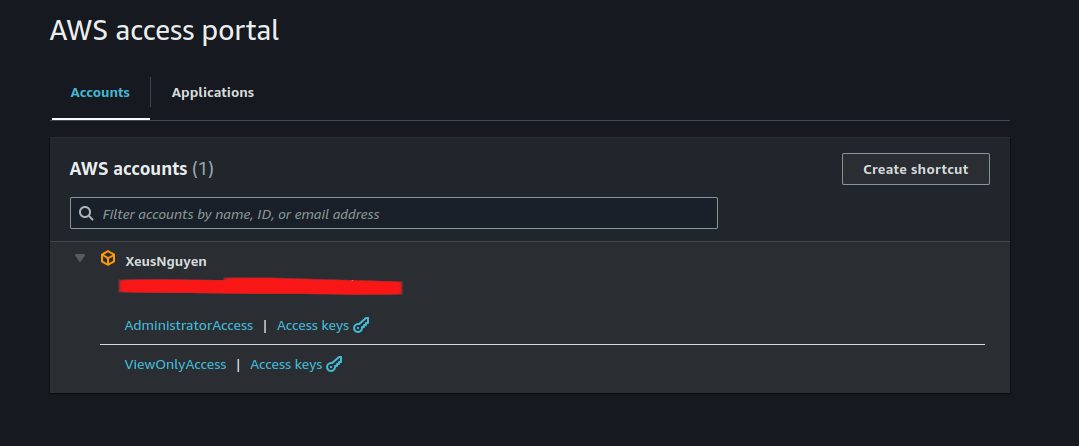
Info
When you try to click to
*Access, you will head up to AWS Portal inside this account with permission you give for user, and withAccess keysthat give you dynamically access keys to connect to your AWS Account with no need generate or configure for yourself
Delete SSO service
To bring down AWS SSO, you just need to run terraform to destroy user, group and permission inside
# See what thing you destroy
terraform plan -destroy

# Apply destroy
terraform destroy
Disable your AWS SSO in region by doing with step in documentation
- Open the IAM Identity Center console.
- In the left navigation pane, choose Settings.
- On the Settings page, choose the Management tab.
- In the Delete IAM Identity Center configuration section, choose Delete.
- In the Delete IAM Identity Center configuration dialog, select each of the check boxes to acknowledge you understand that your data that will be deleted. Type your IAM Identity Center instance in the text box, and then choose Confirm.
Conclusion

Success
This is all for this weekend, hope you feel great with adventure to hand on with AWS SSO and provide supply methodology to contribute your
terraformmodule for your own. This story can come so long, but so sorry I think it is enough and more things I wonder you need to get from this. But I recommend you try to fail, and get the experience for yourself and AWS SSO is a one of top solution for modern AWS managing 🚬
Quote
This week is really tough, and gonna say about I don’t have mood to release anything else, but for my savage, I want to continue contribute for my community, you are such a great things to help me stand up and think every day. Therefore, plz stay safe, learn new something and I will see yah next weekend. Bye bye 👋